Add Variables and Run Pipeline
Add Variables to Gitlab
Access CI/CD Variables
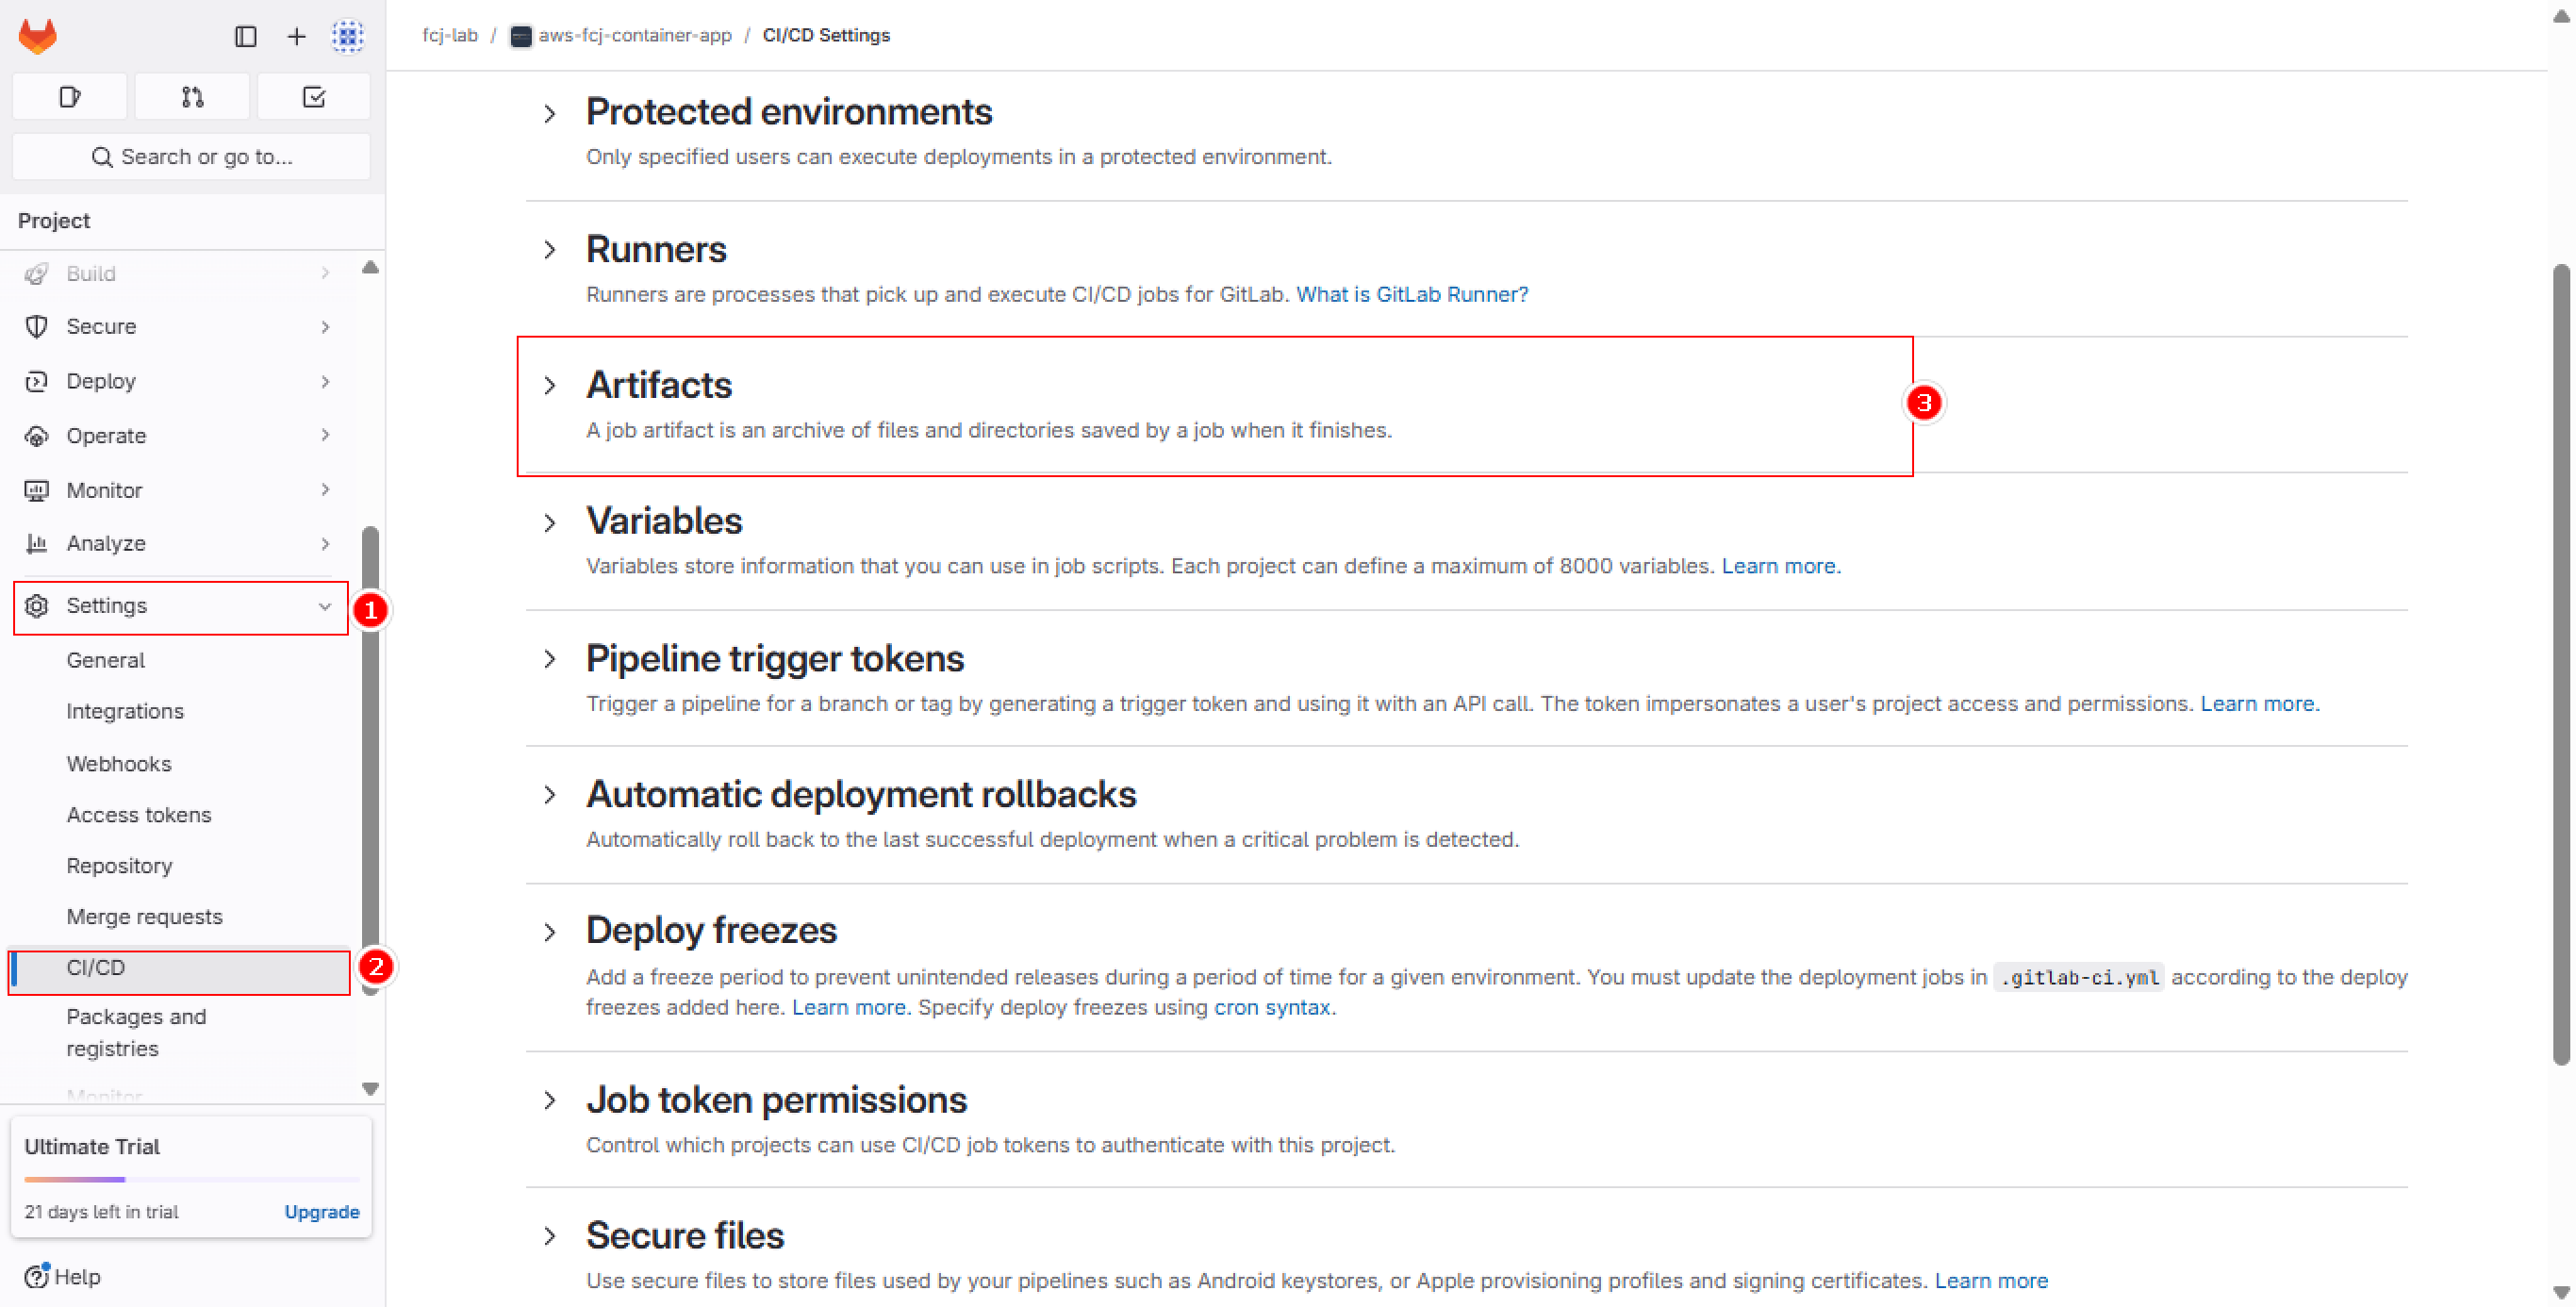
- Go to “Settings” in the left menu
- Select “CI/CD” from the list
- Expand the “Variables” section
Set up Environment Variables
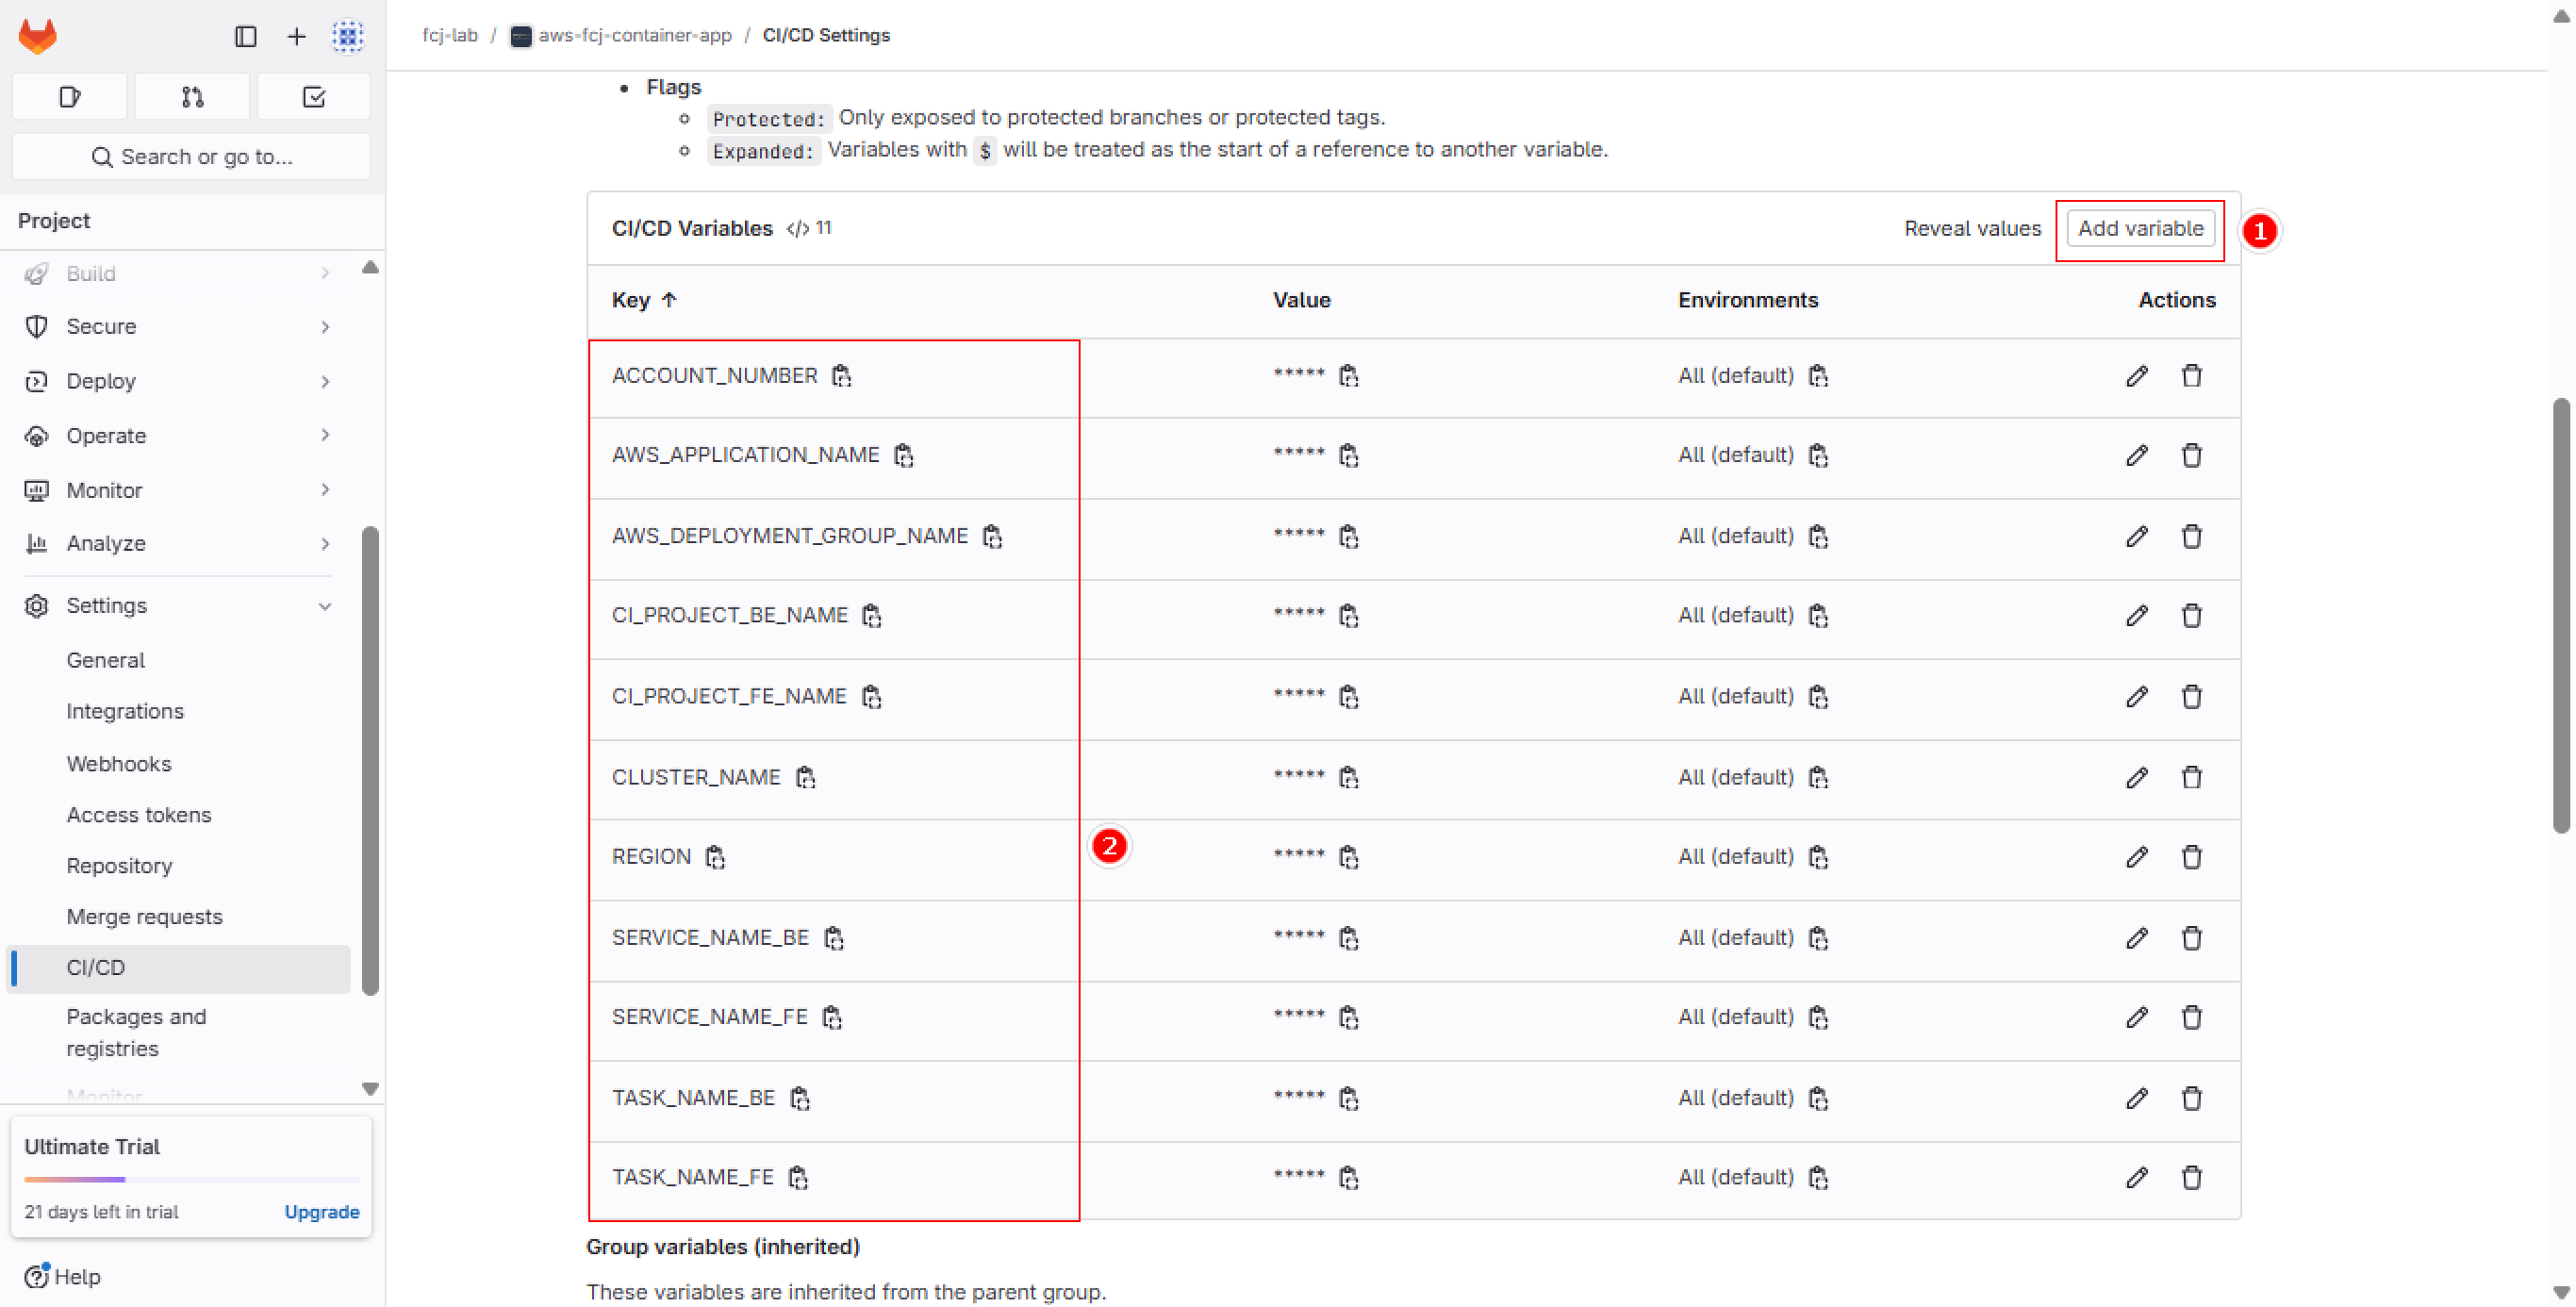
Add the following variables to the project:
- CLUSTER_NAME: ECS Cluster name containing frontend and backend services
- SERVICE_NAME_FE: Frontend ECS Service name to update in Cluster
- SERVICE_NAME_BE: Backend ECS Service name to update in Cluster
- REGION: AWS Region in use (e.g., ap-southeast-1)
- AWS_APPLICATION_NAME: Application name in CodeDeploy
- AWS_DEPLOYMENT_GROUP_NAME: Deployment group name in CodeDeploy
- ACCOUNT_NUMBER: AWS Account ID
- CI_PROJECT_BE_NAME: Backend project name in ECR
- CI_PROJECT_FE_NAME: Frontend project name in ECR
- TASK_NAME_FE: Frontend Task Definition name
- TASK_NAME_BE: Backend Task Definition name
Ensure all variables are set to Protected and Masked mode to protect sensitive information.
Create Tag
Access Tags Section
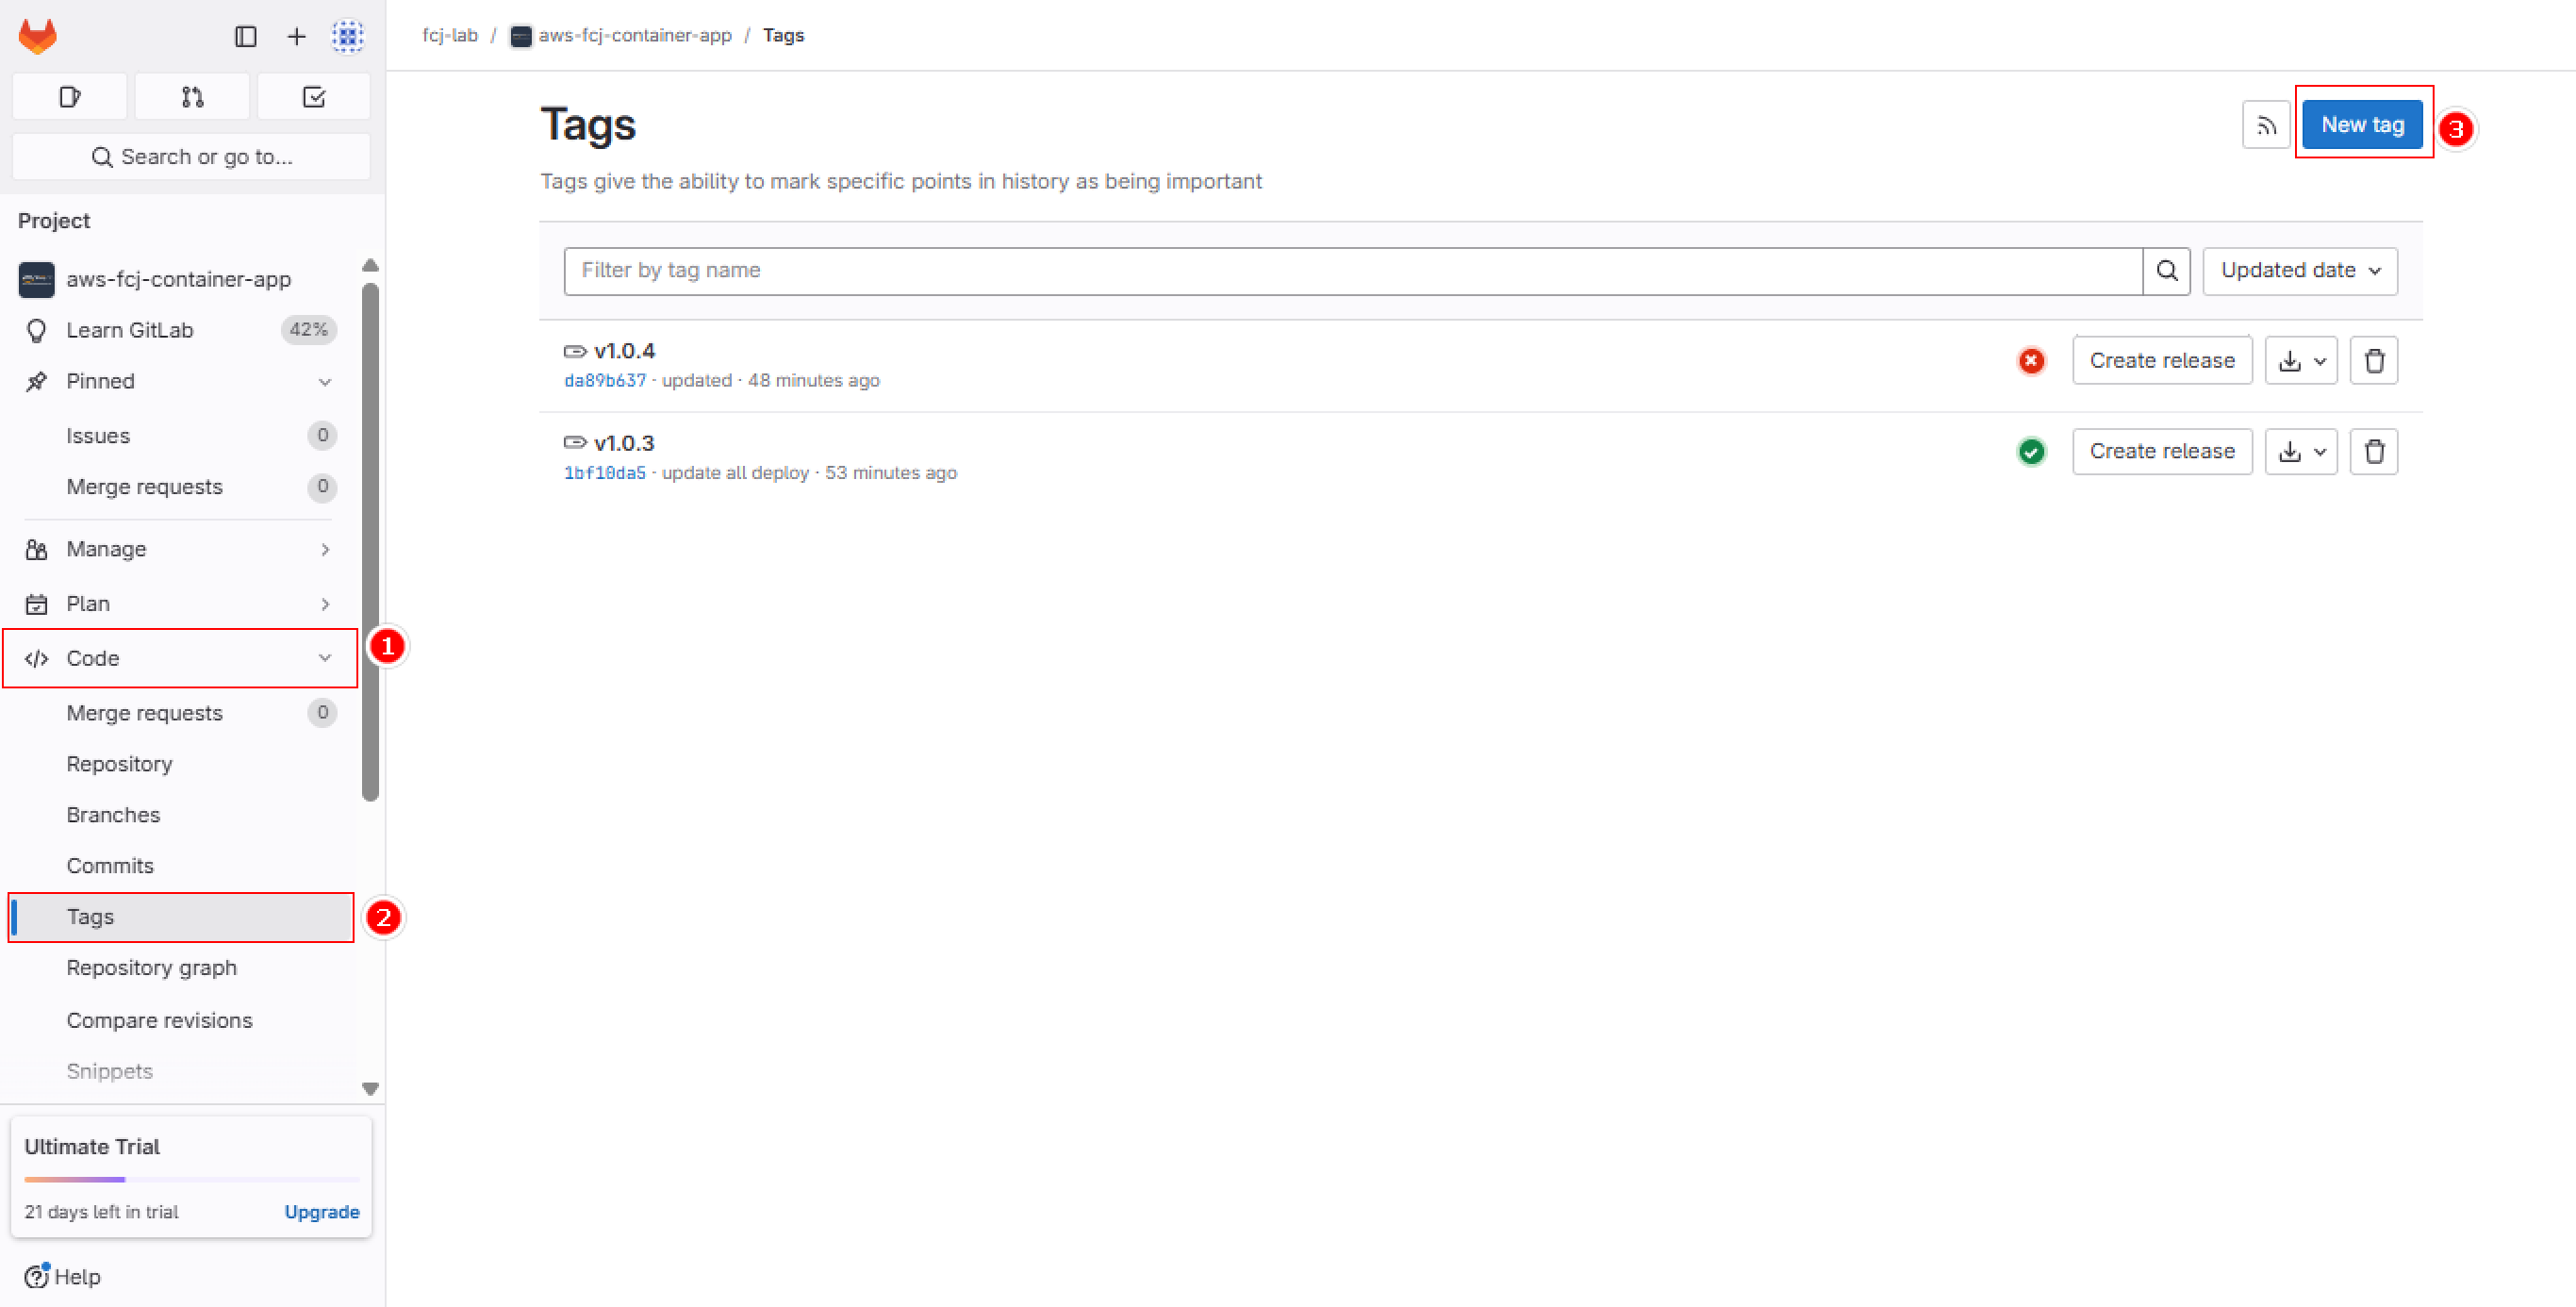
- Click “Code” in the left sidebar
- Select “Tags” from the submenu
- Click “New tag” button in the top right corner
Create New Tag
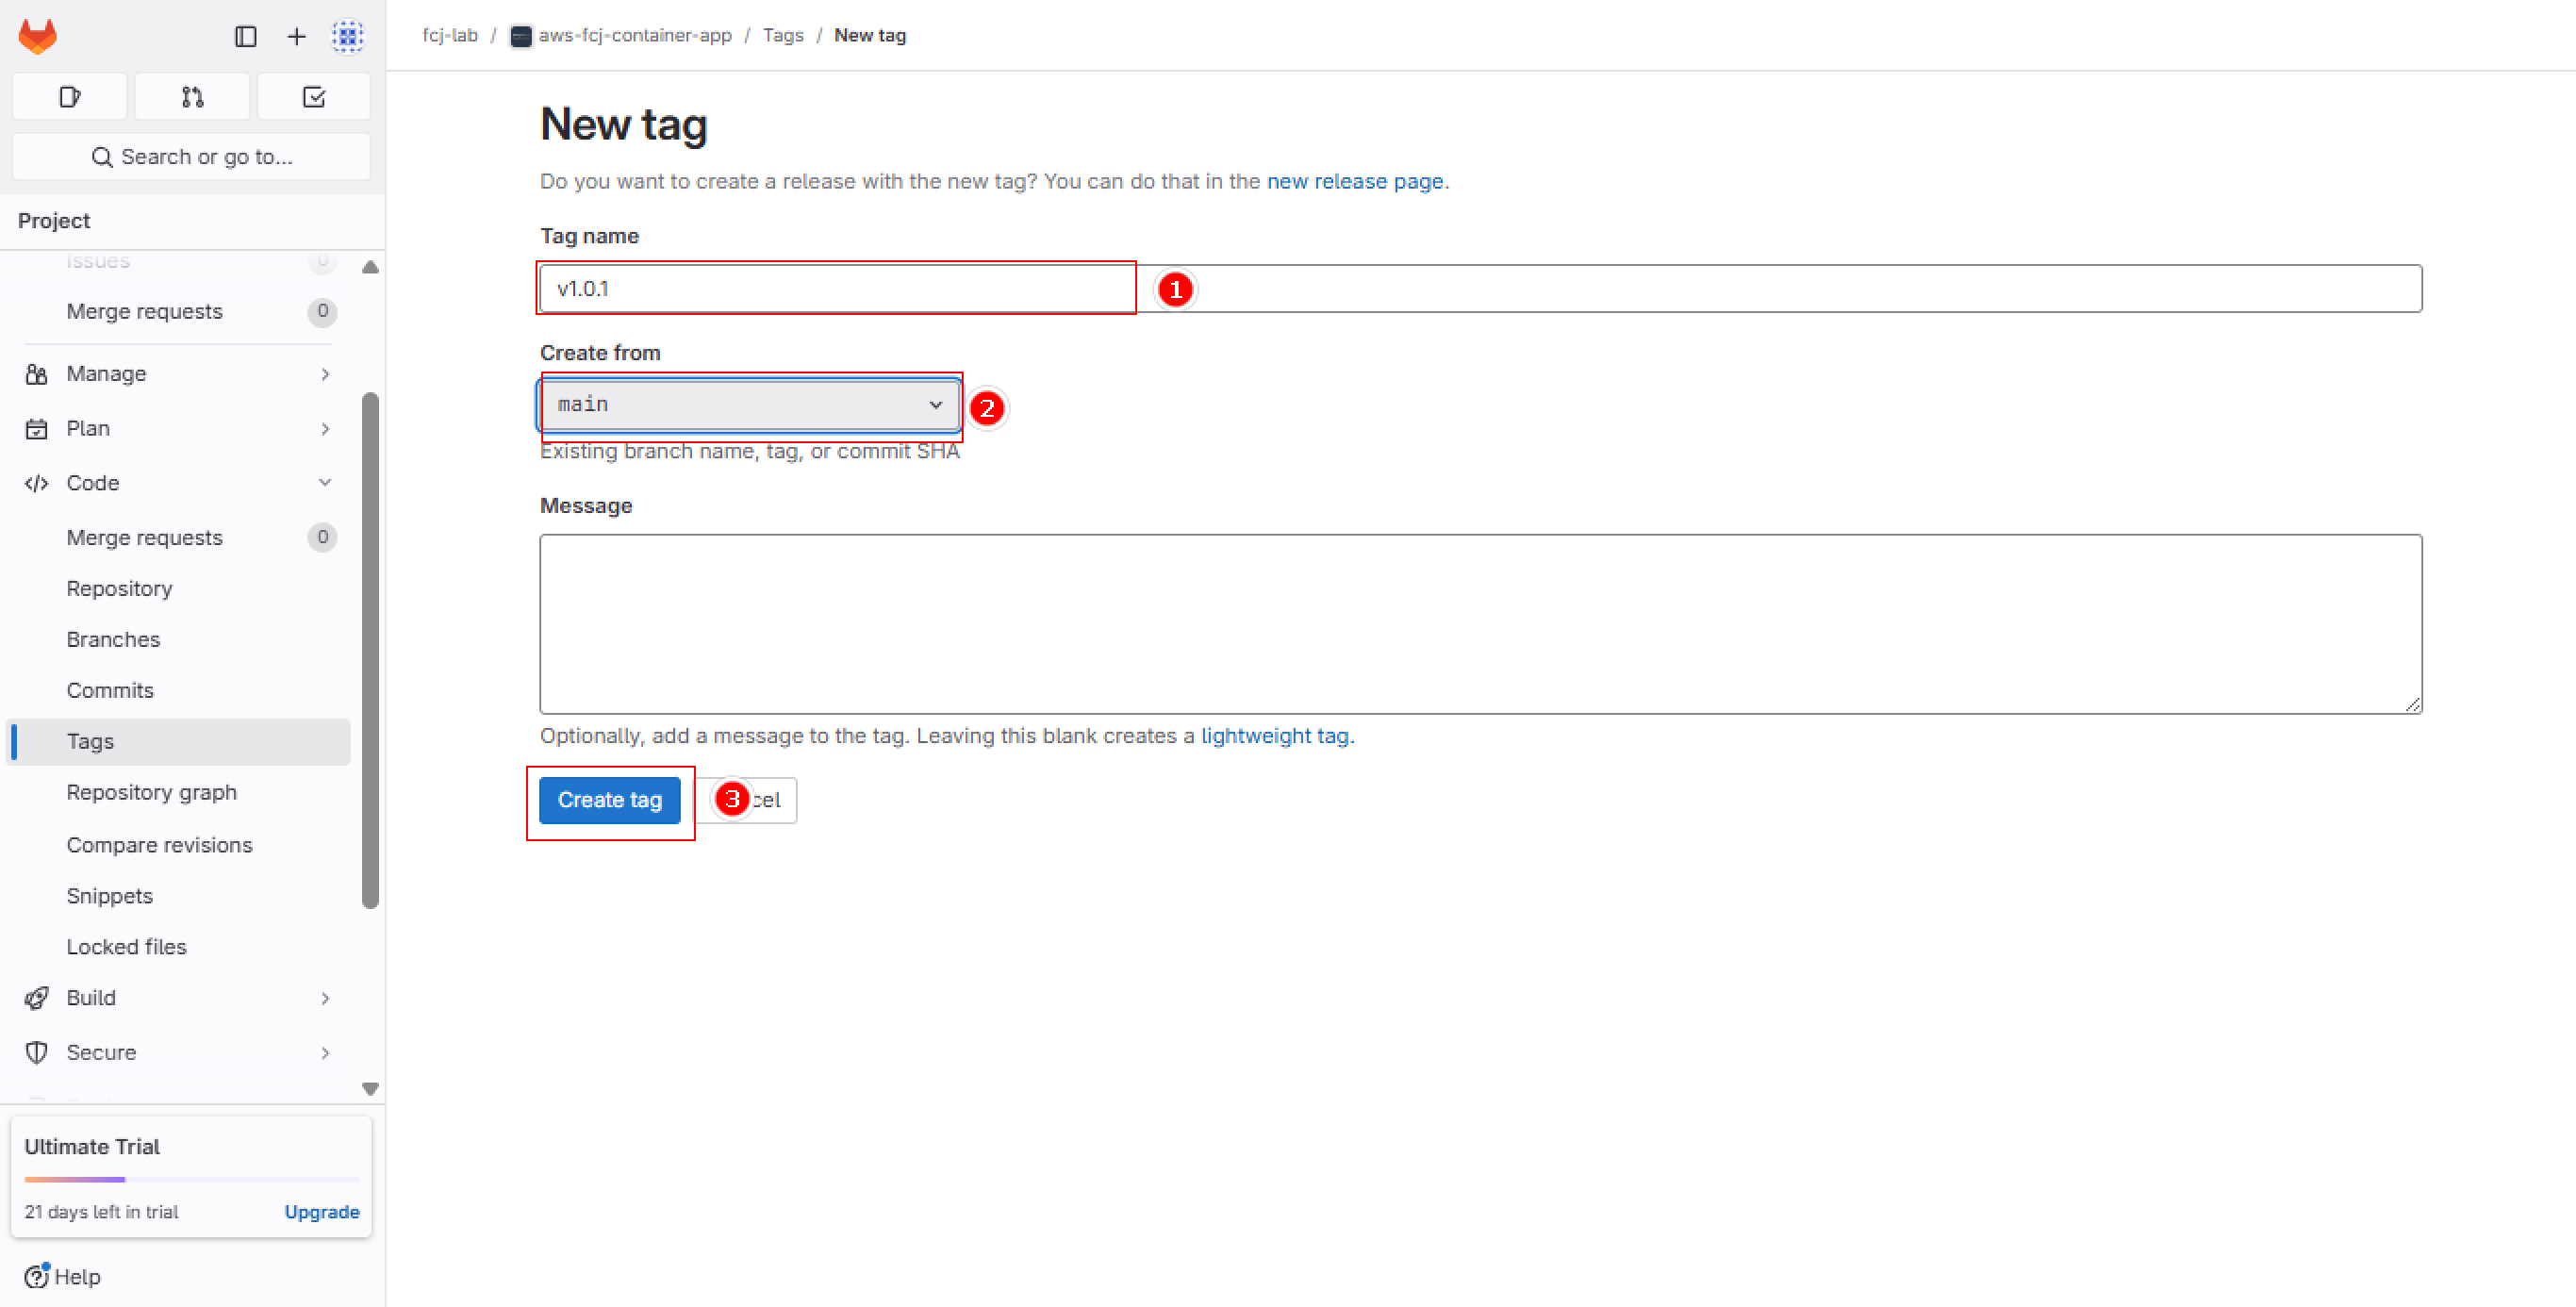
Fill in the required information:
- Enter tag name (e.g., “v1.0.1”) in the Tag name field
- Select “main” from the Create from dropdown
- Optionally add a message to describe the tag
- Click “Create tag” button to finish
Tags are used to mark release points in your code. Use semantic versioning (e.g., v1.0.0) for better version management.
View Pipeline
After creating a tag, GitLab will automatically trigger the pipeline to deploy the application. To view the execution process:
Access CI/CD Pipelines
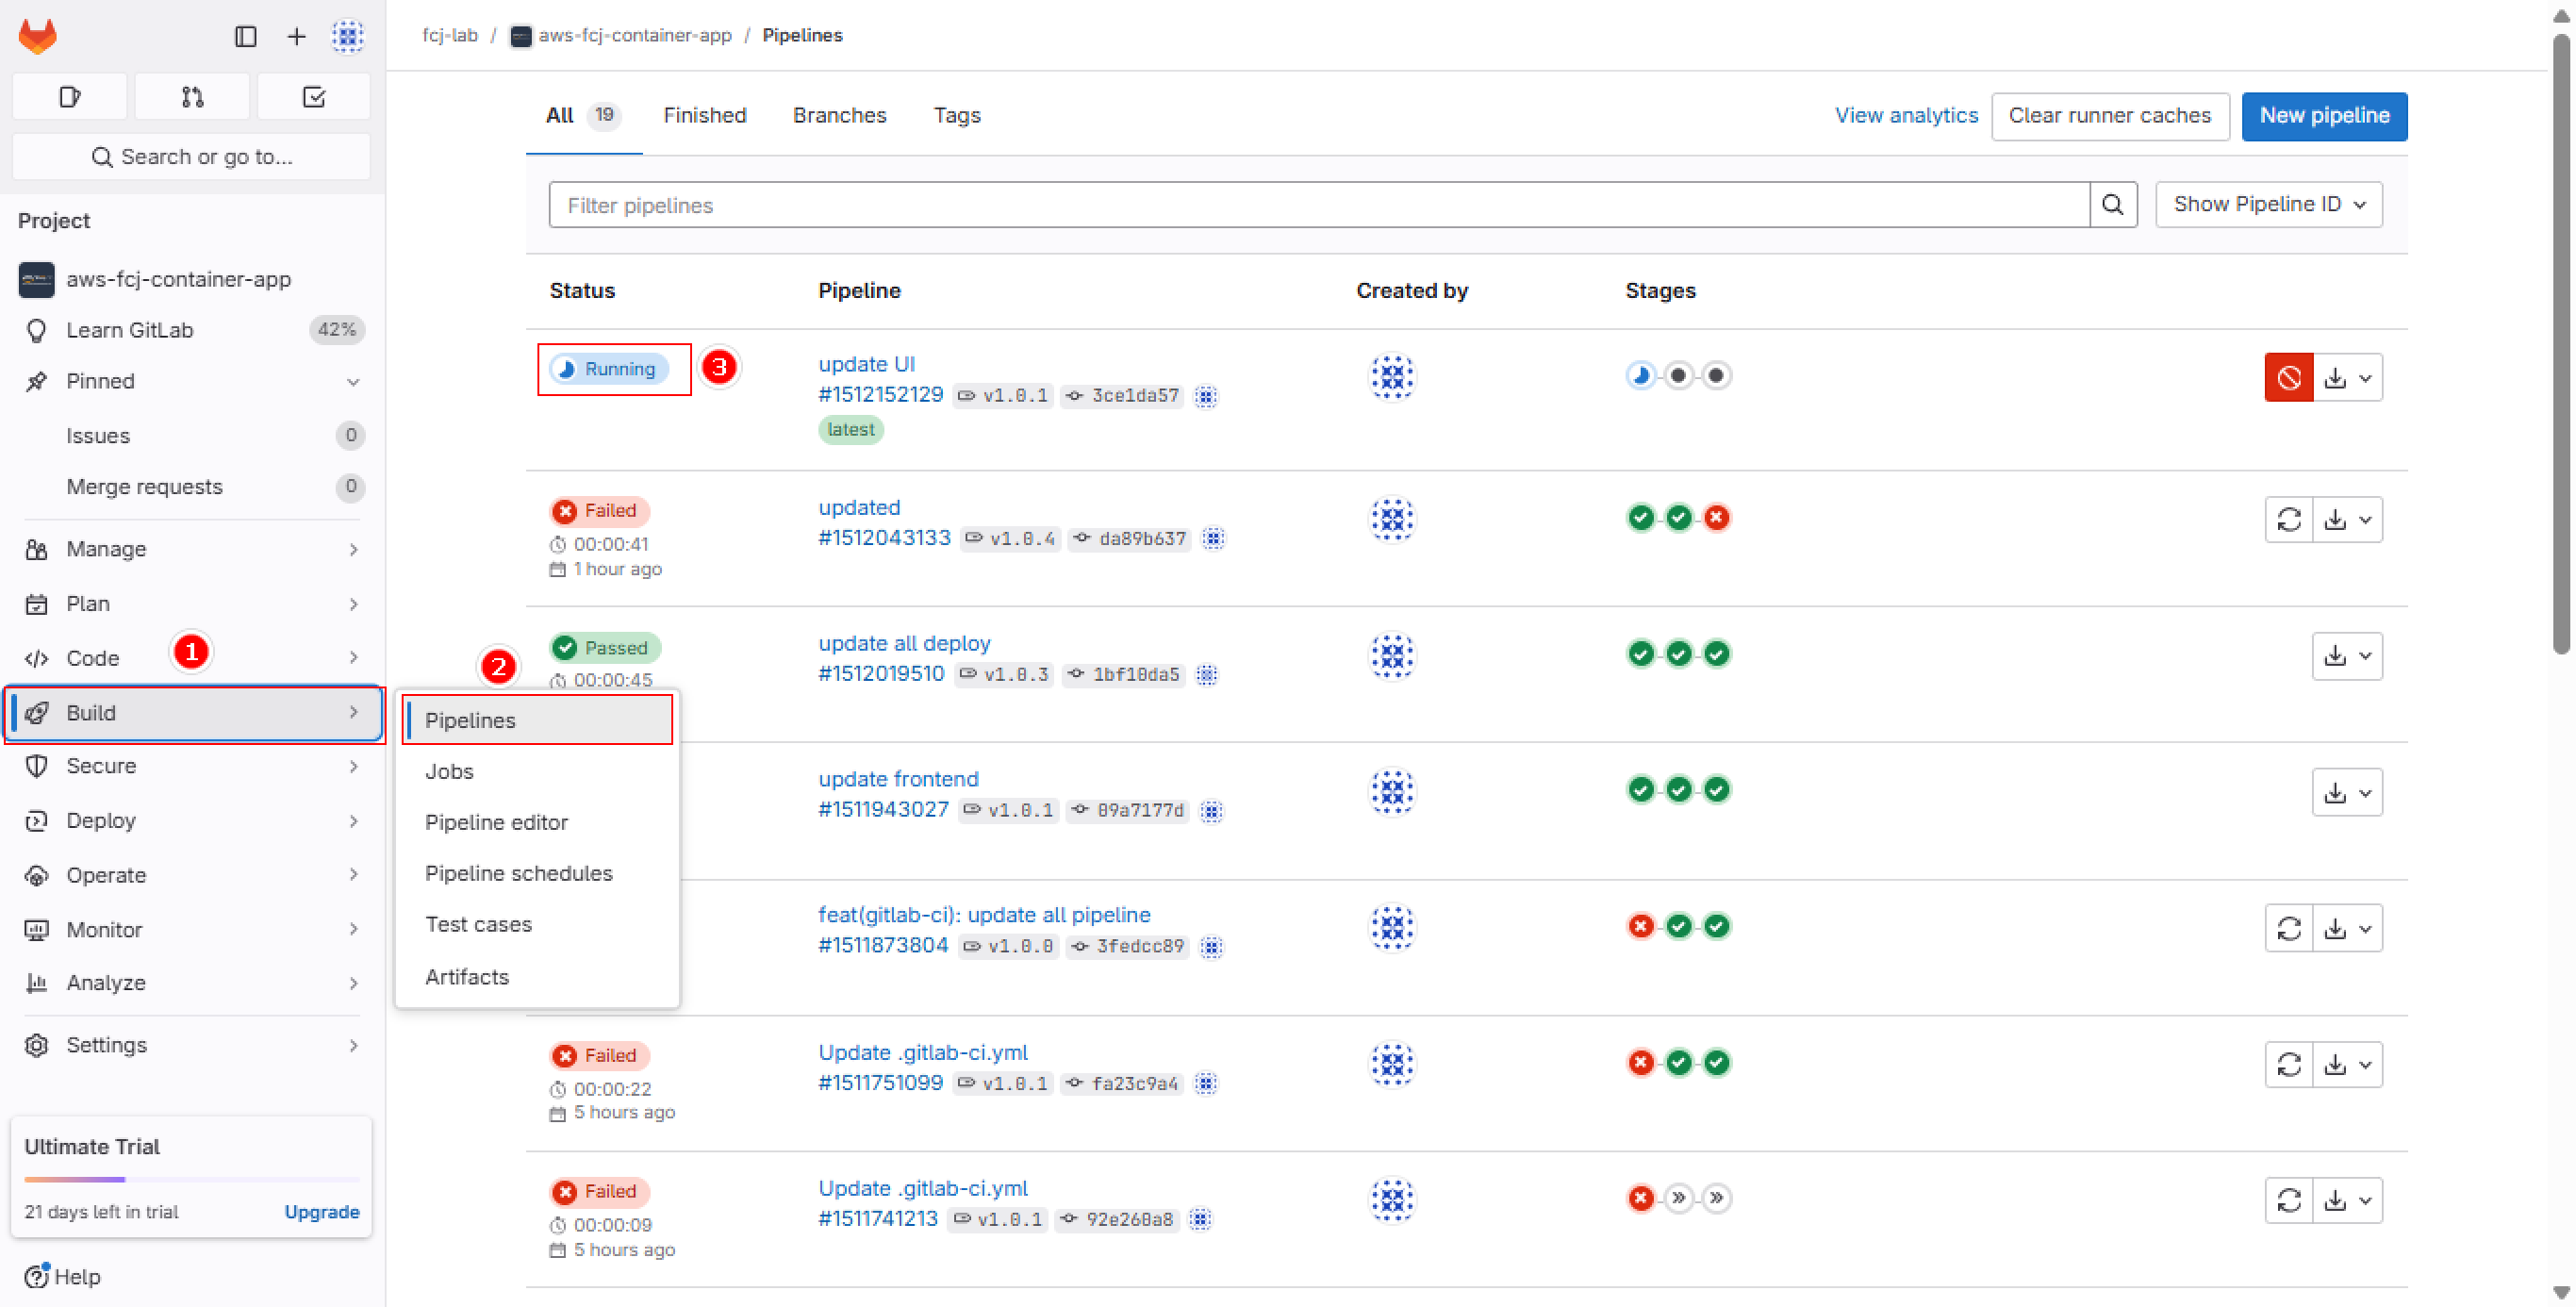
- Click “Build” in the left sidebar
- Select “Pipelines” from the submenu
- Choose the pipeline to view
View Pipeline Overview
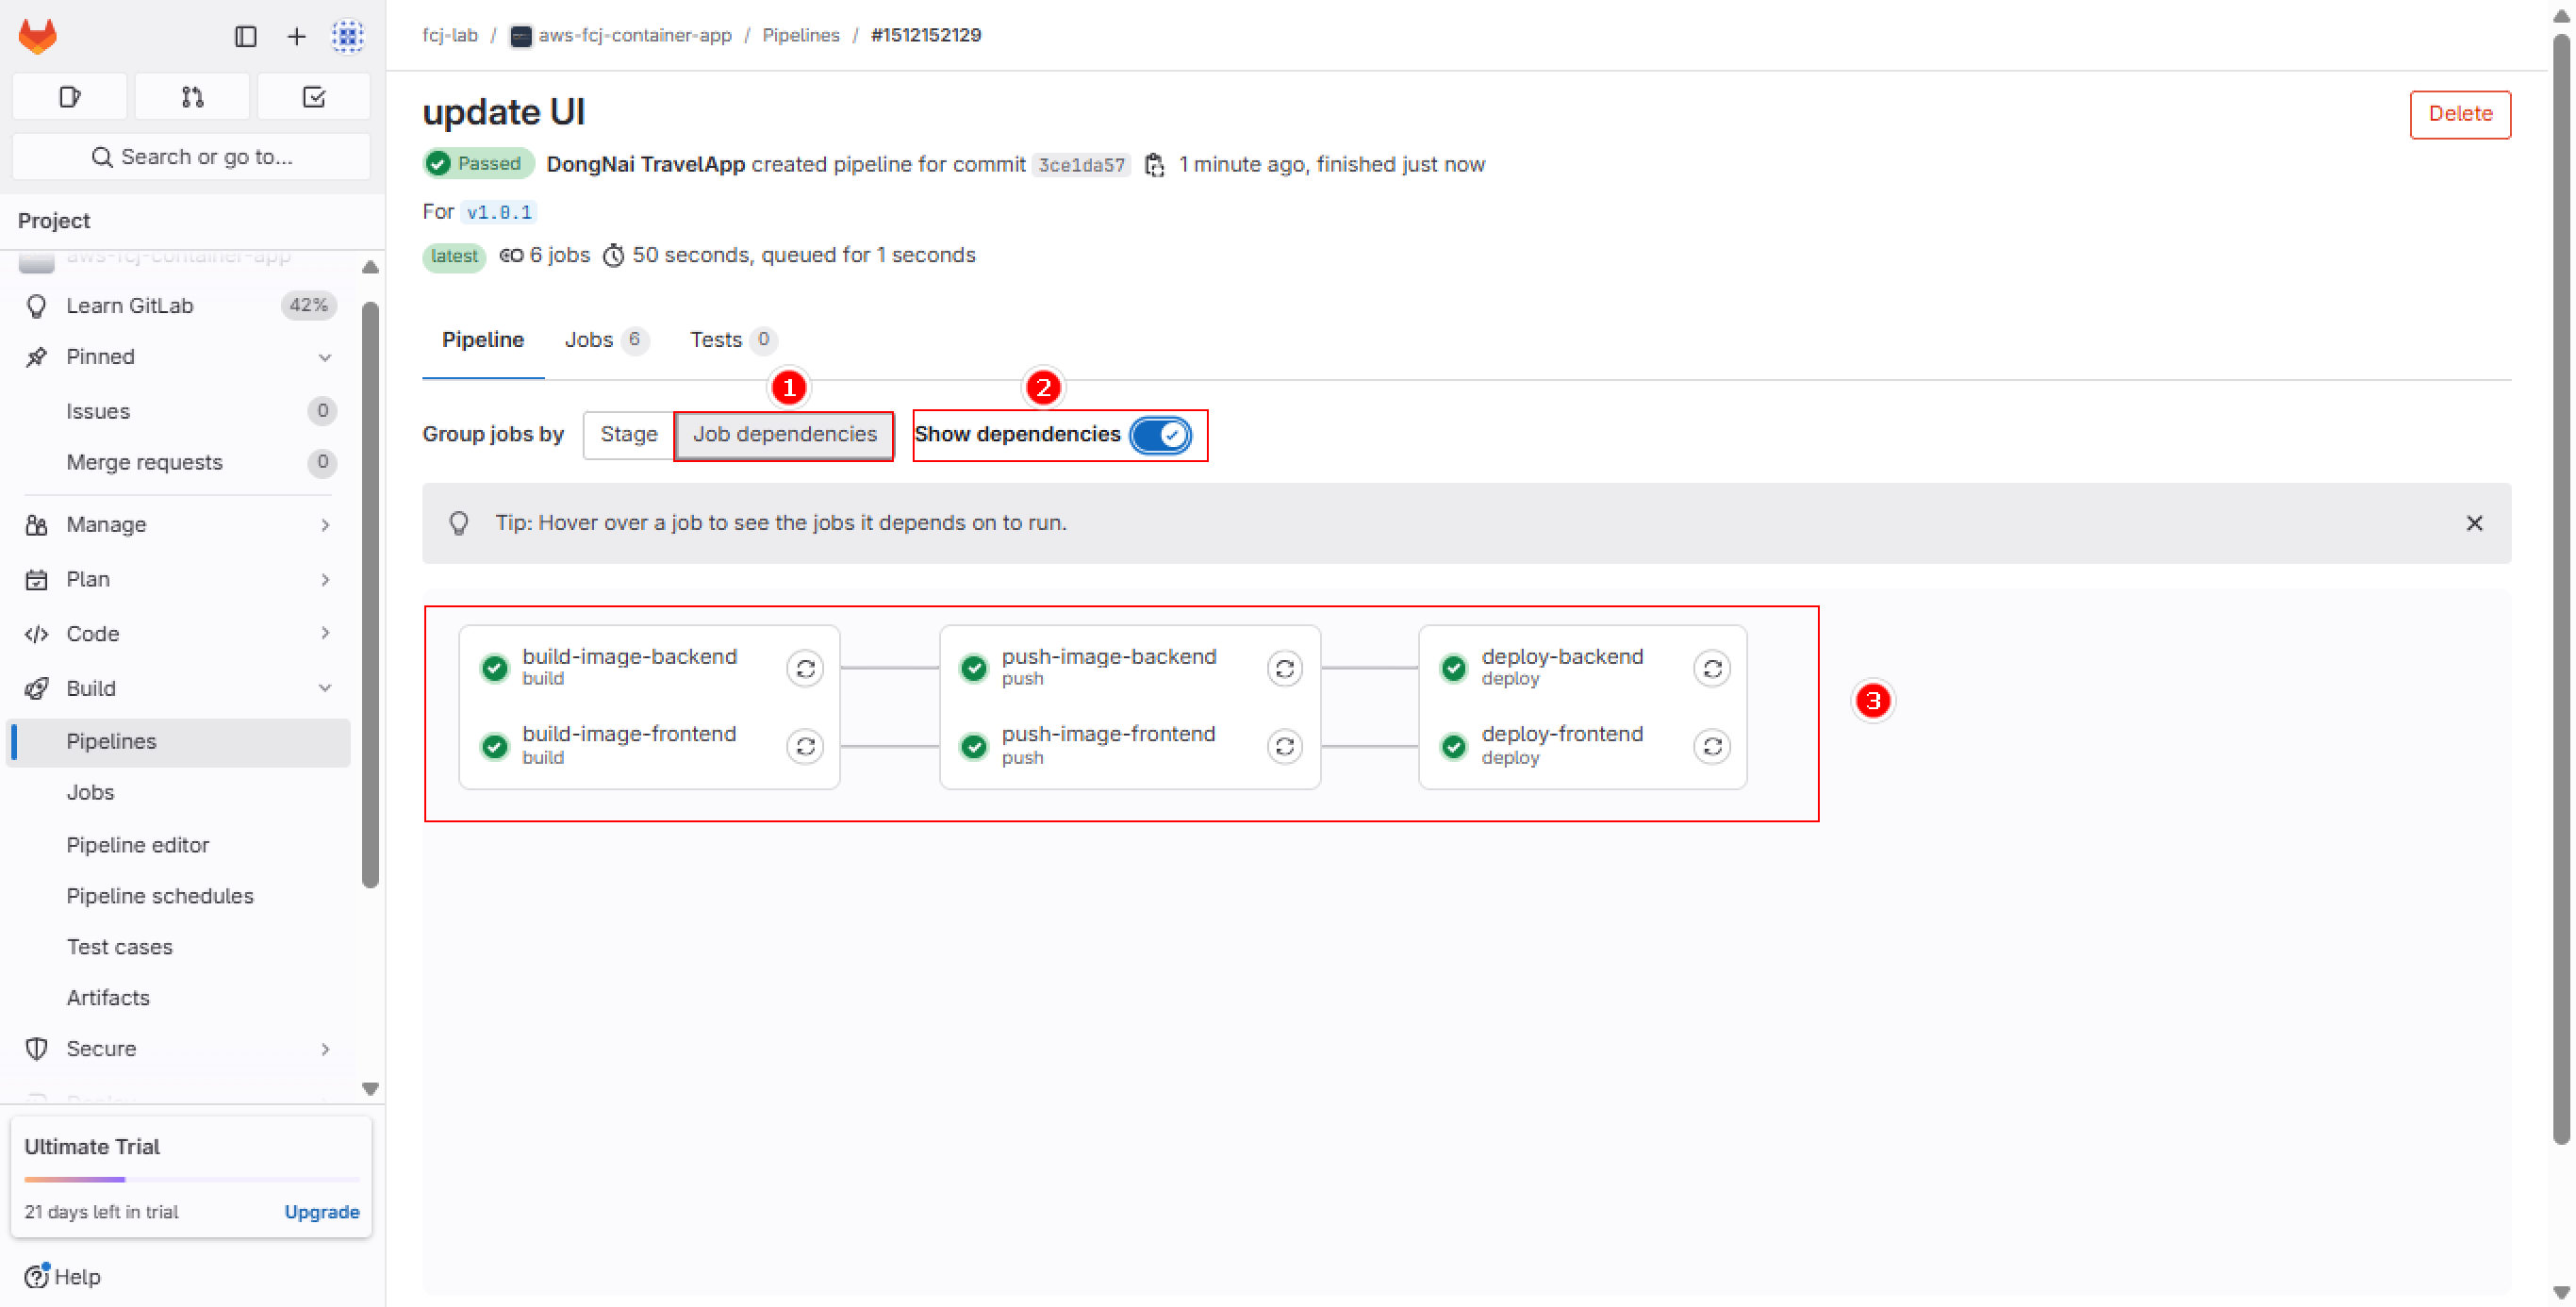
- Pipeline triggered for tag “v1.0.1”
- Select “Job dependencies” to view workflow
- Enable “Show dependencies” to display relationships between jobs
- Pipeline consists of 3 main stages:
- Build: Create Docker images for both frontend and backend
- Push: Push images to container registry
- Deploy: Deploy application to environment
View Job Details

- Each job displays detailed execution logs
- Example with deploy-backend job:
- Perform ECR login
- Run deploy-backend.sh script
- Display deploymentId of the deployment process
- Show job success/failure result
Green color indicates successful job execution. Click on each job to view detailed logs. Monitor execution time and status of each job.