Fork and Modify Repository
In this section, we will learn how to fork an existing repository and make changes to the forked repository. This is the first step to begin the CI/CD process.
Fork Repository
Fork Repository allows you to create an independent copy of the original repository in your GitLab account. This enables you to freely make changes without affecting the original repository.
- Initialize Fork
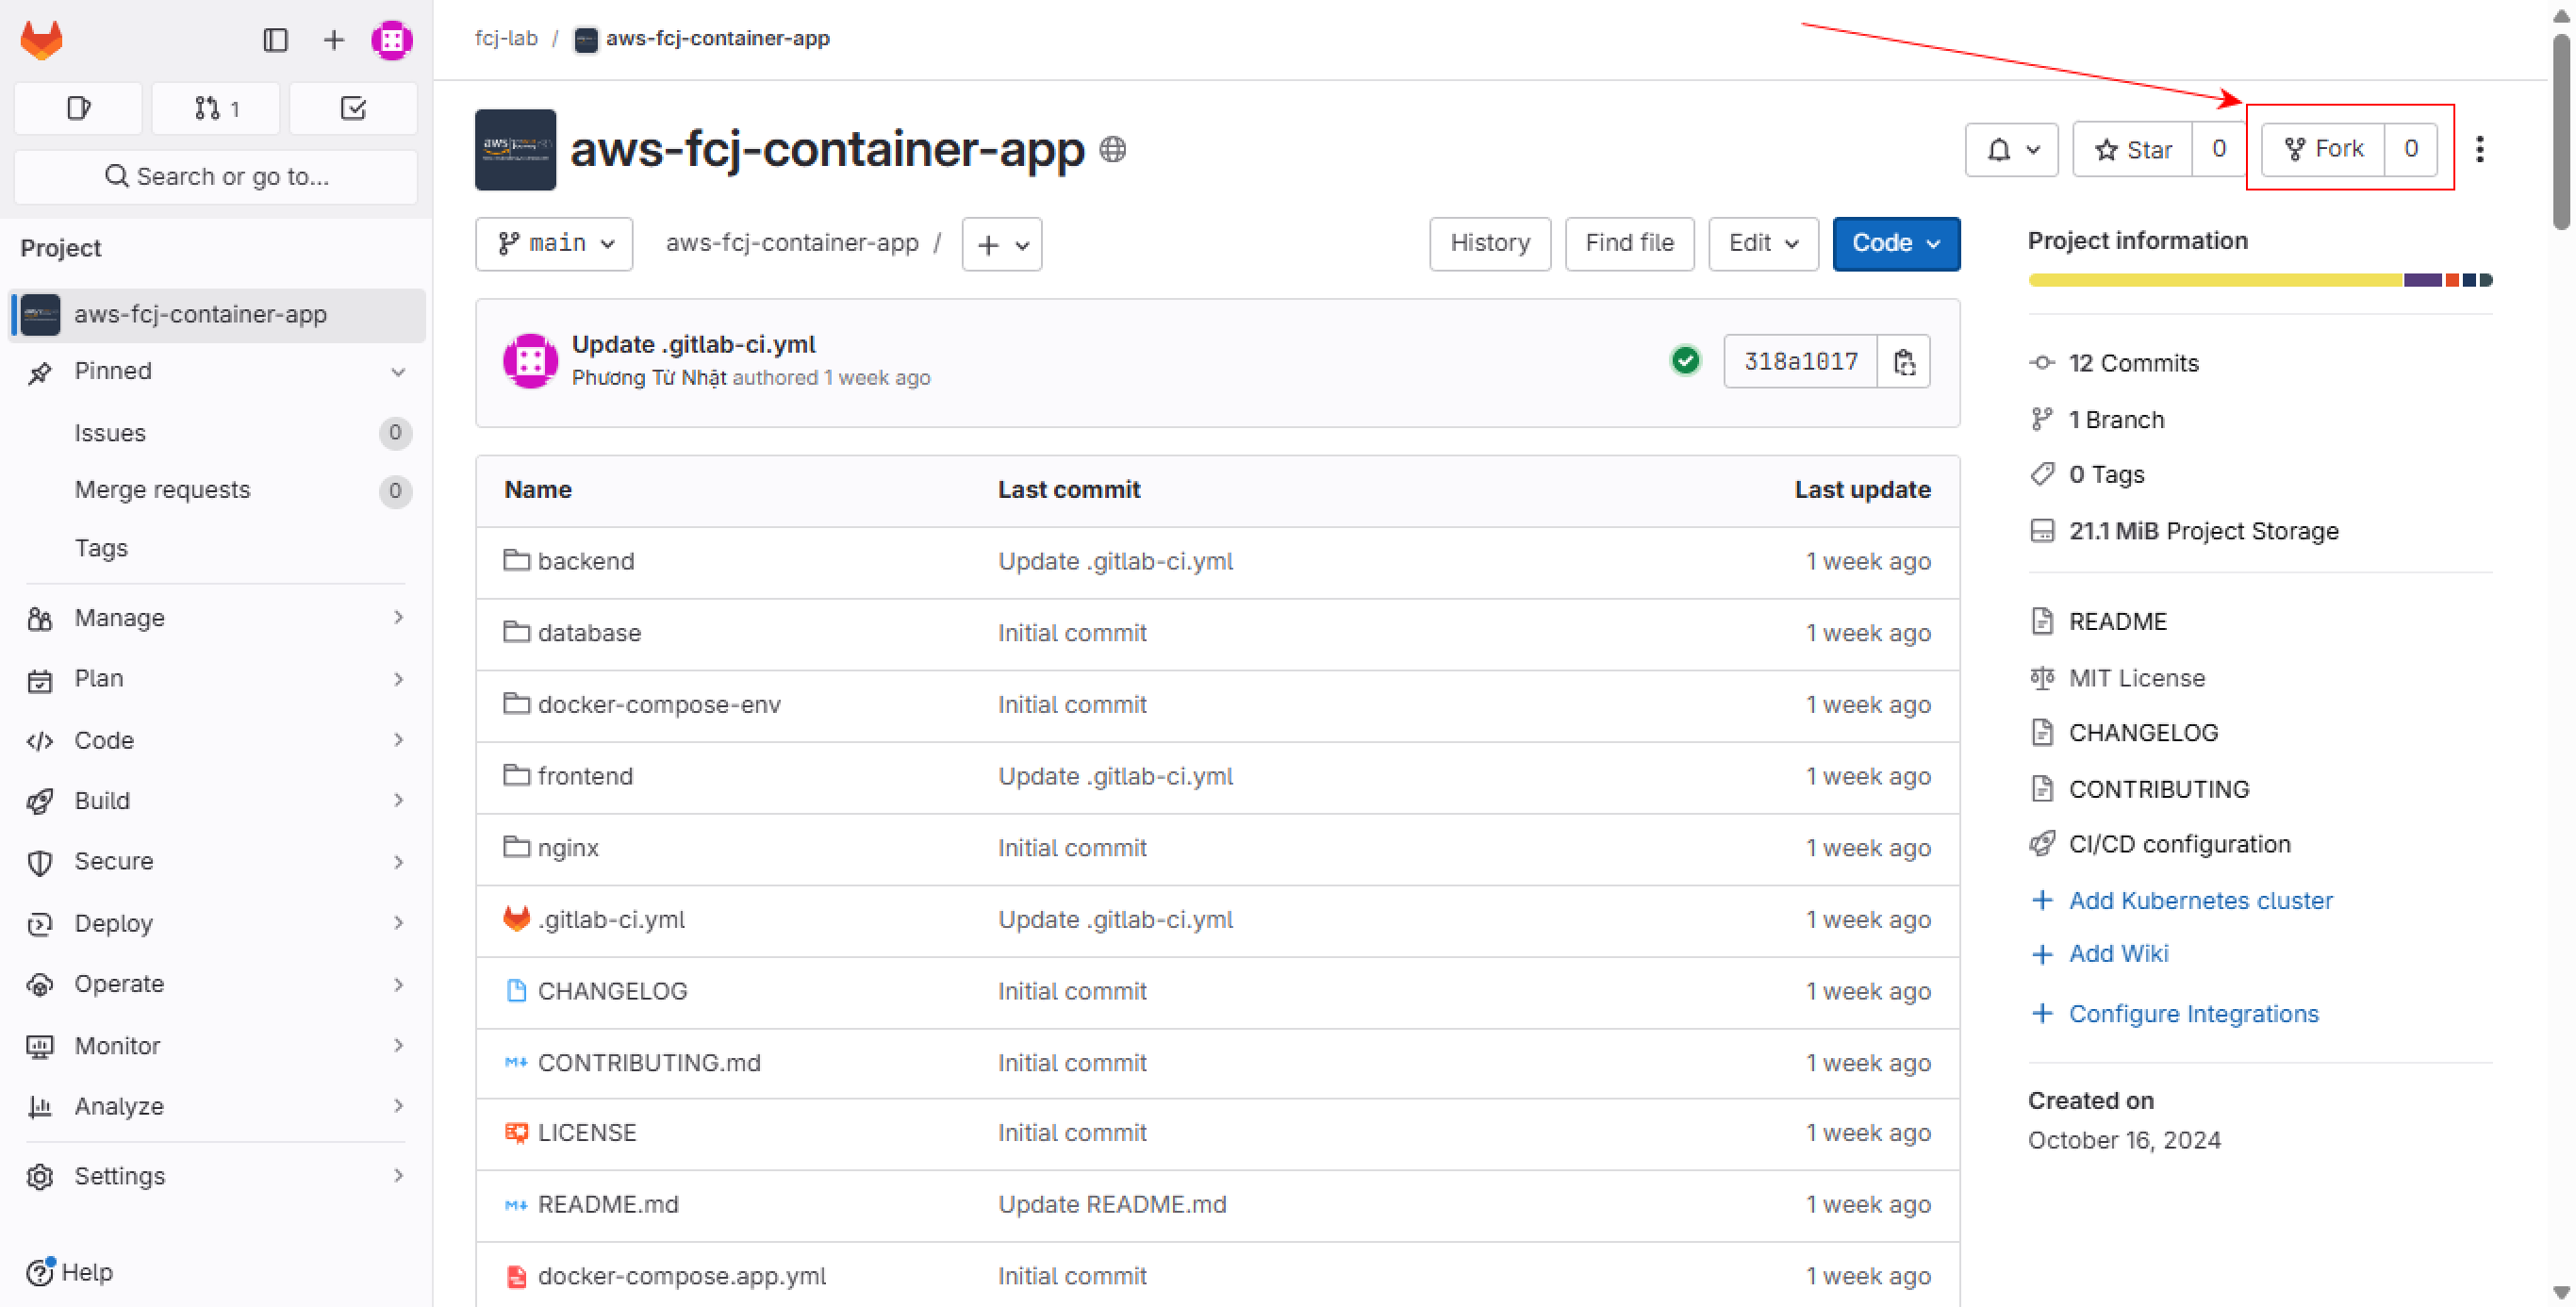
- Access the original repository at aws-fcj-container-app
- Locate and click the “Fork” button in the top right corner
- Configure Fork
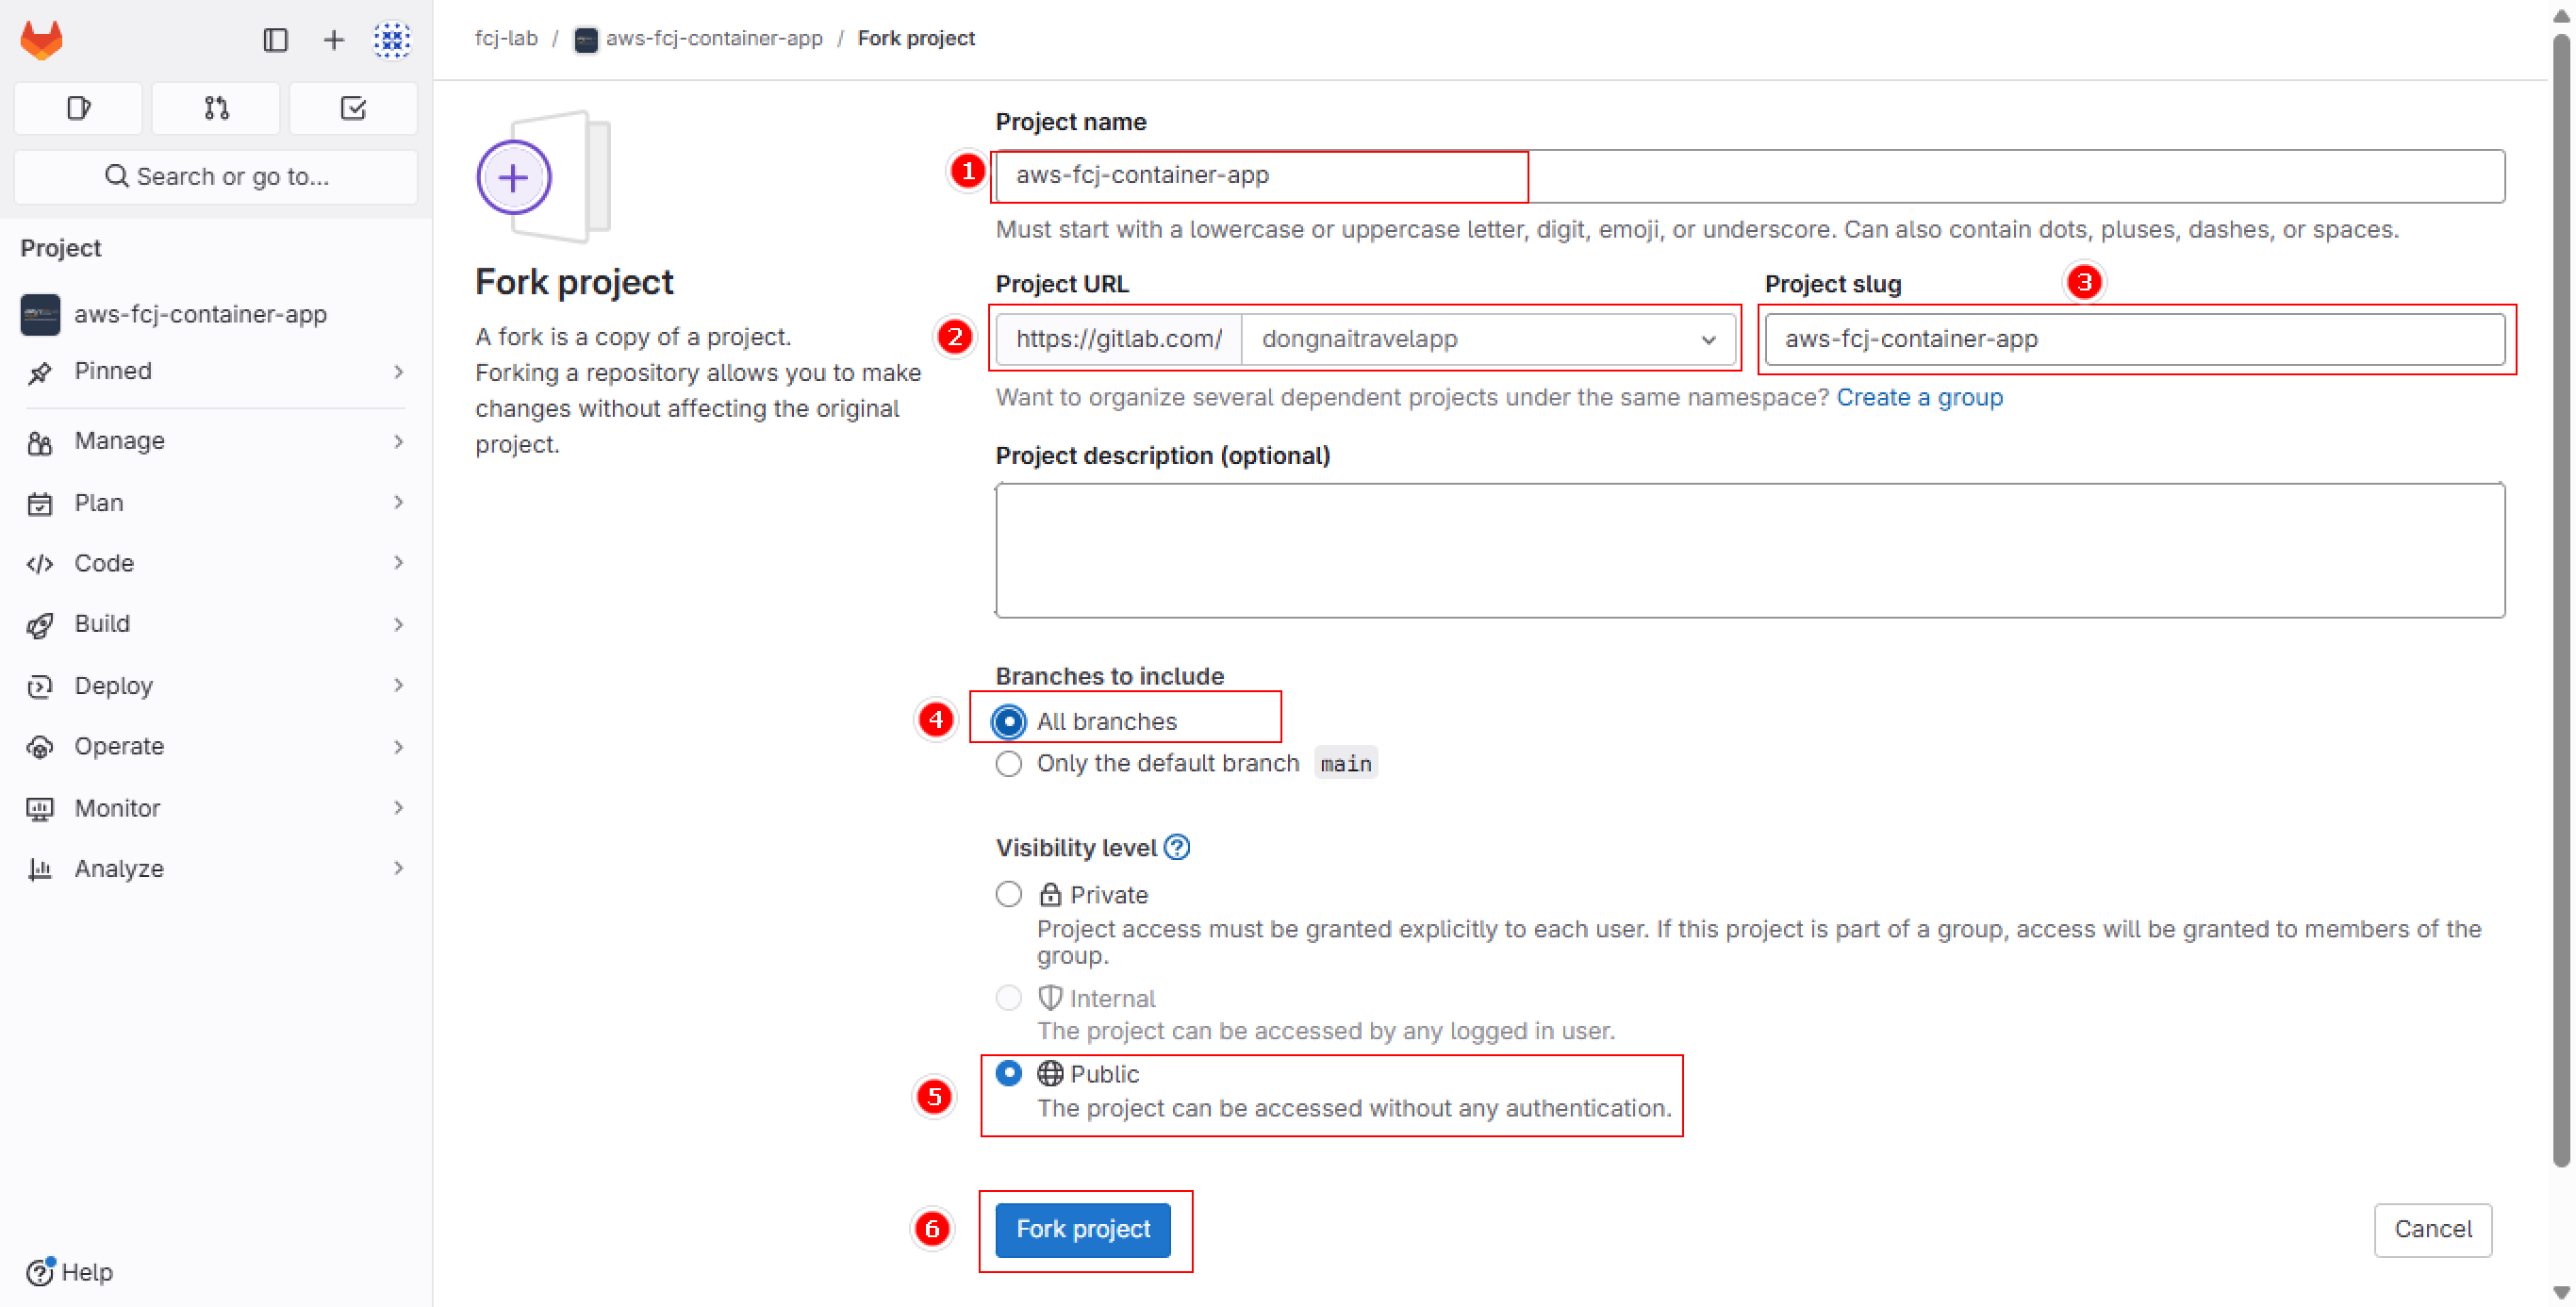
Set up basic parameters:
- Project name: Keep as aws-fcj-container-app
- Project URL: Select appropriate namespace
- Project slug: Leave as default
- Branches: Select All branches to copy everything
- Visibility: Choose Public for open access
- Complete by clicking Fork project
Selecting All branches gives you the complete development history of the project, useful for tracking changes and developing new features.
- Verify Fork
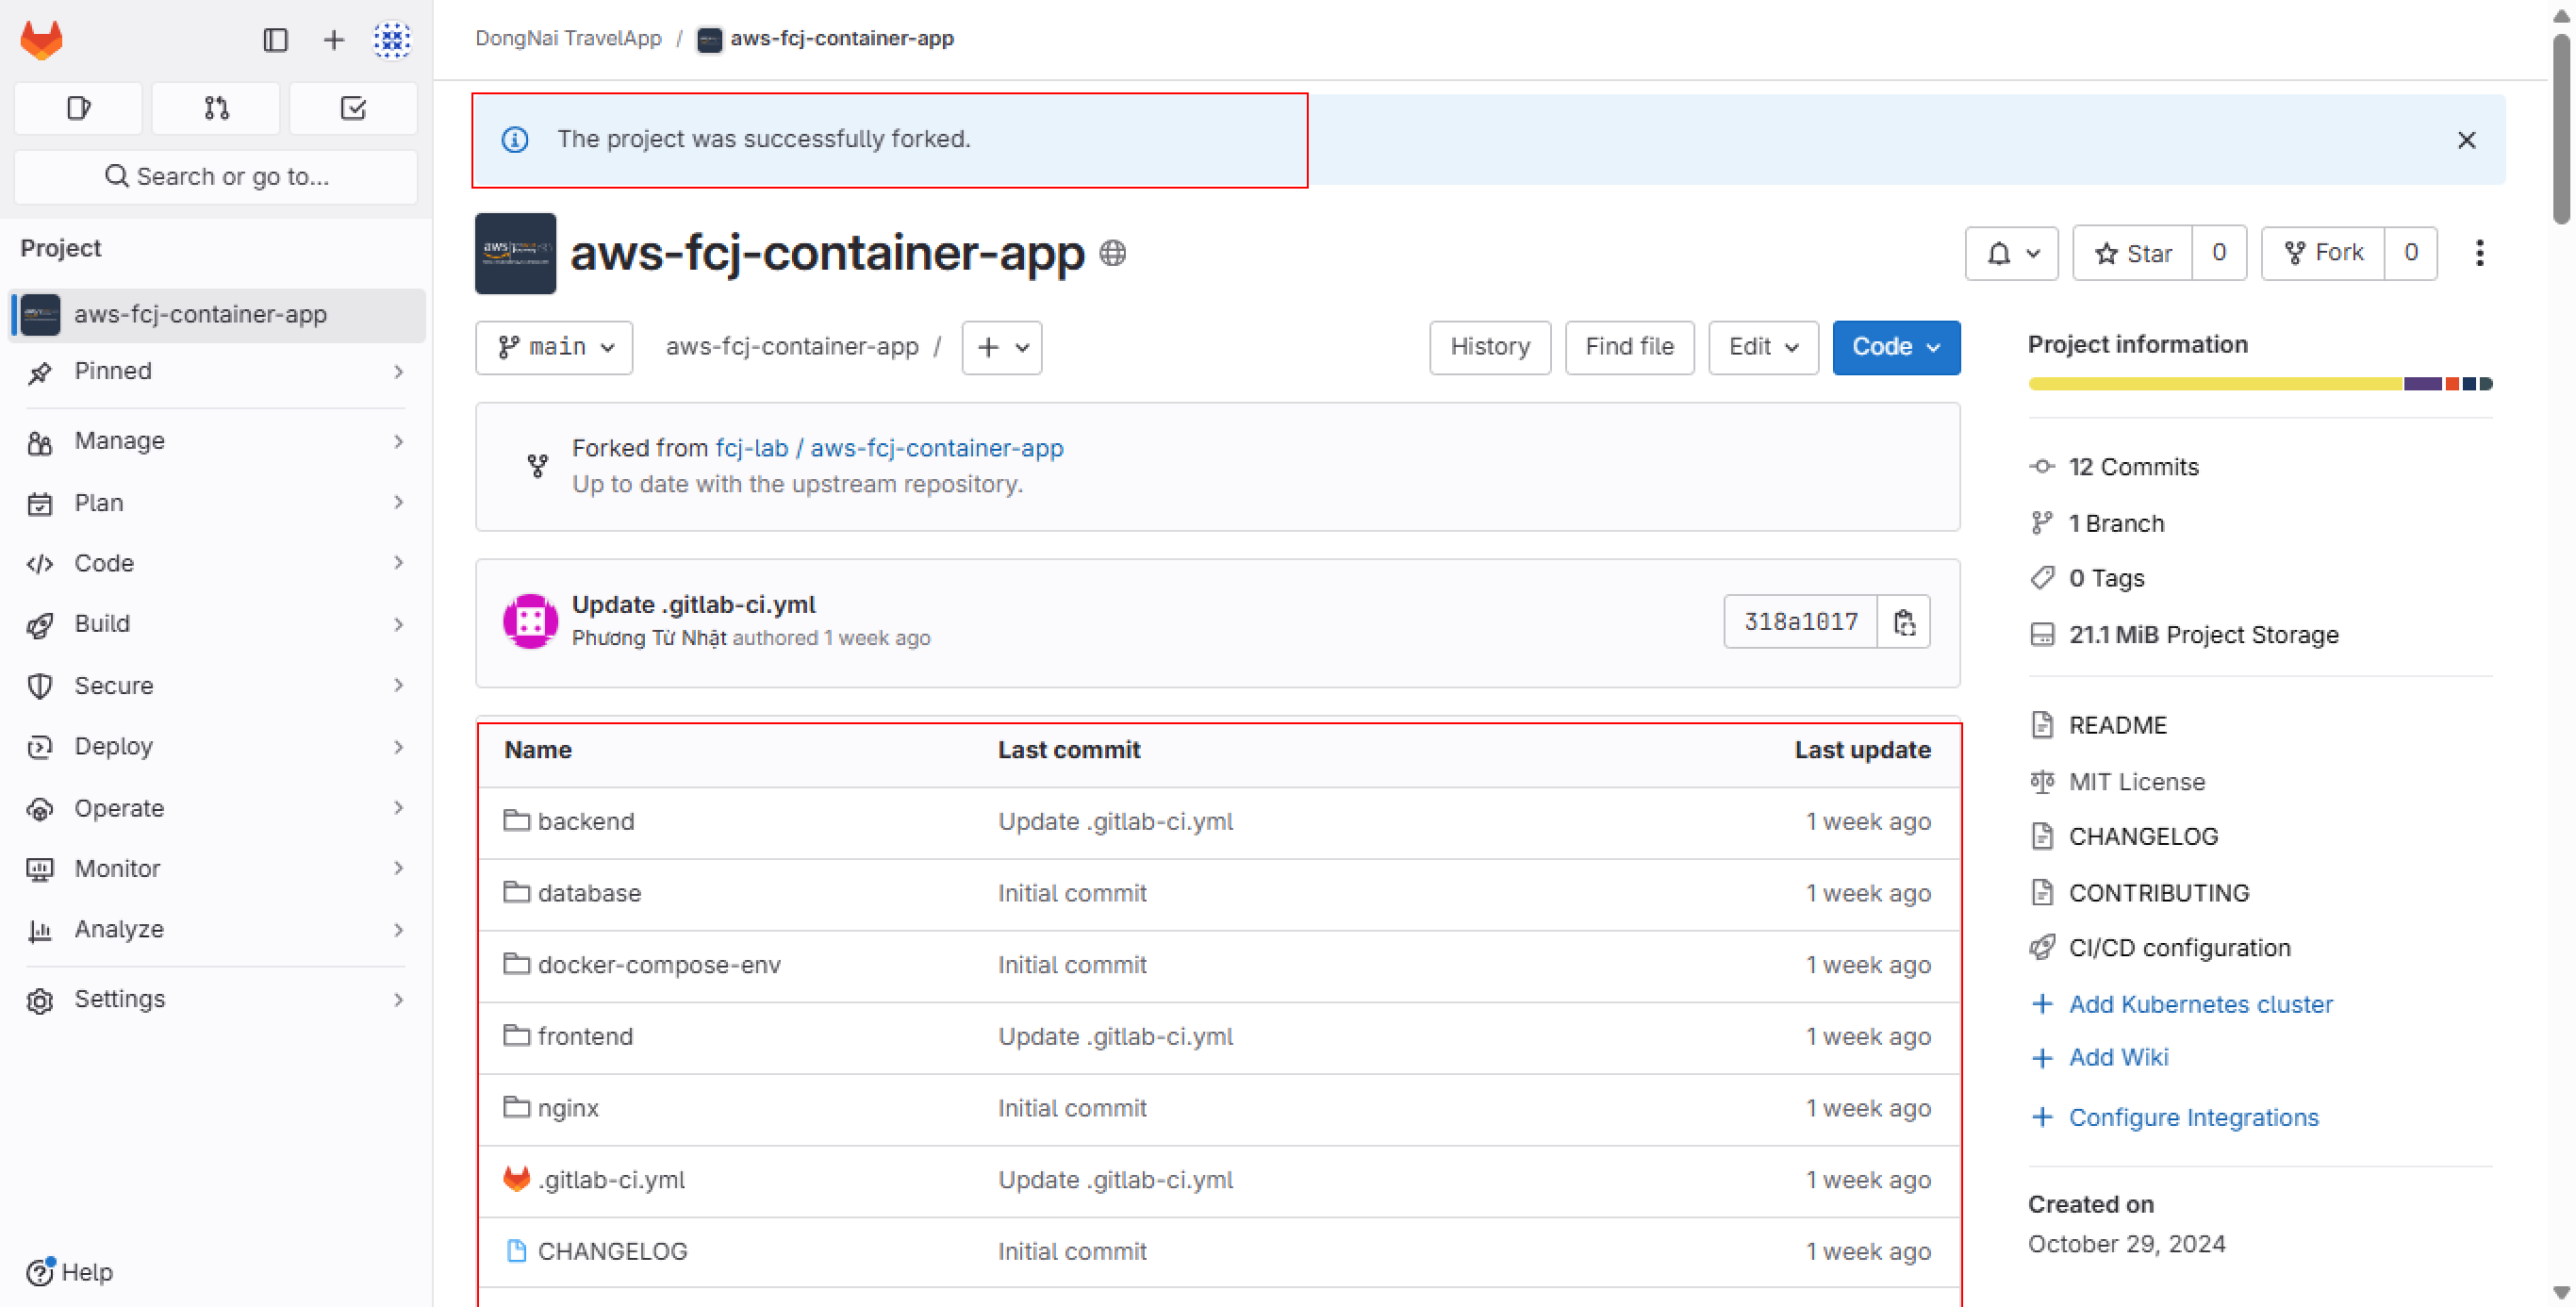
Check the following elements:
- Fork success message appears
- Directory structure is fully copied
- Commit and branch information is preserved
Modify Source Code
- Locate File
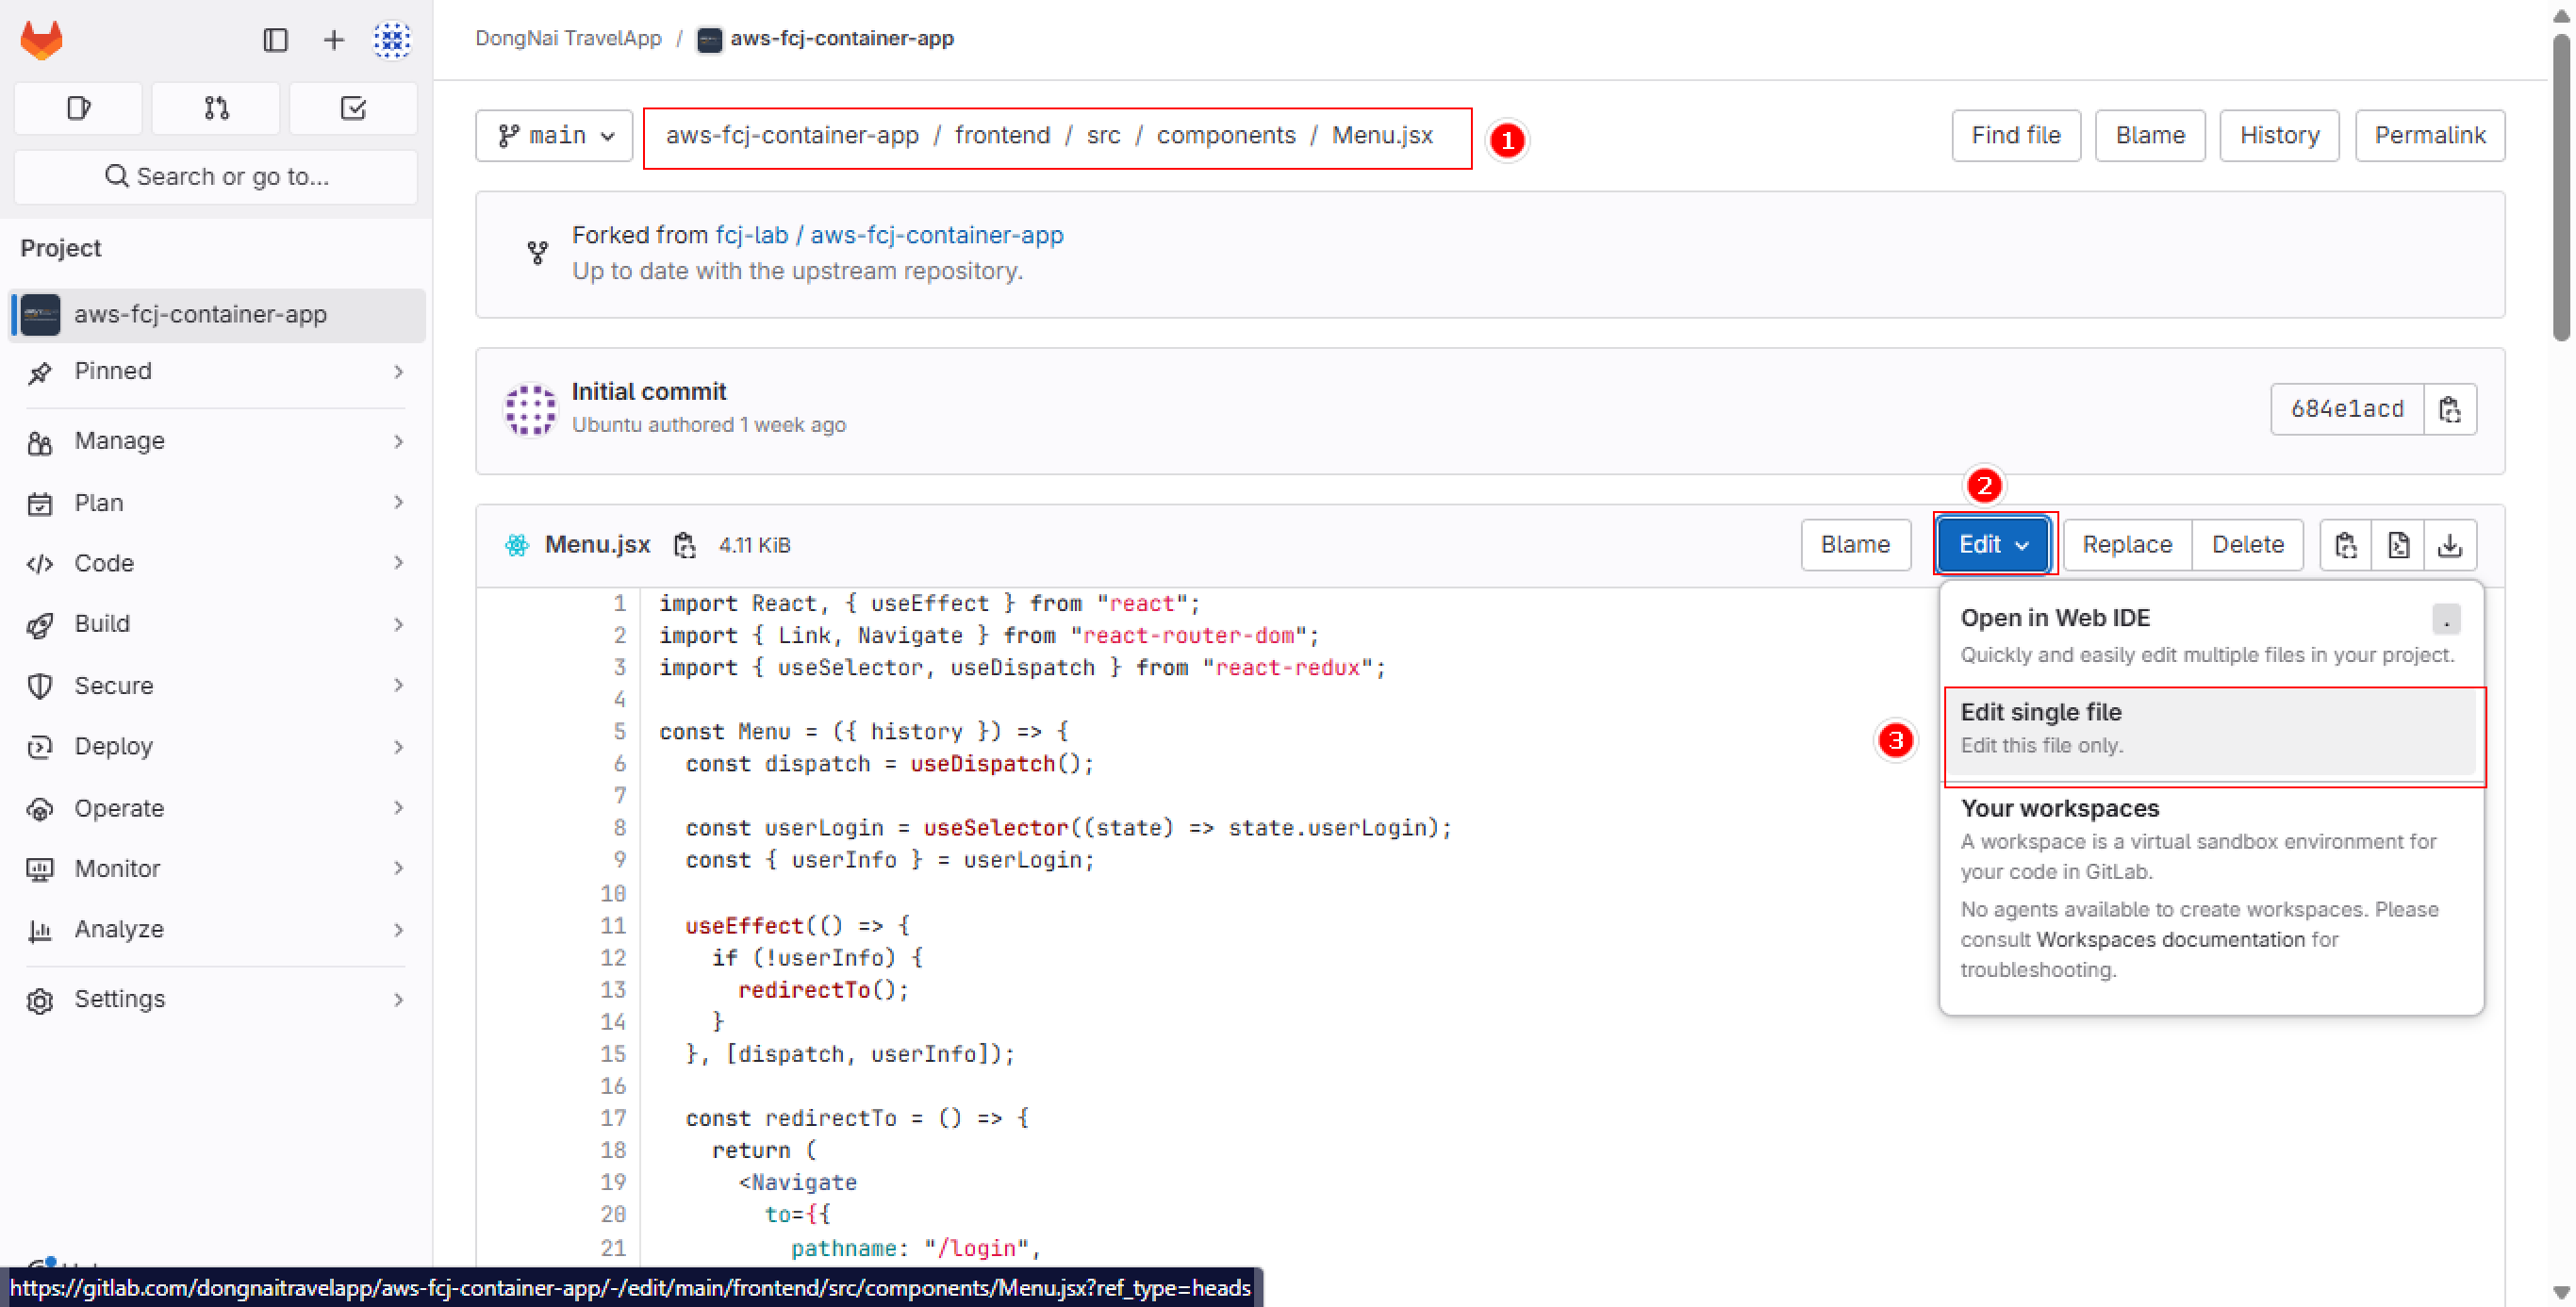
Access the file to modify:
- Path: frontend/src/components/Menu.jsx
- Select Edit then Edit single file
- Update Content
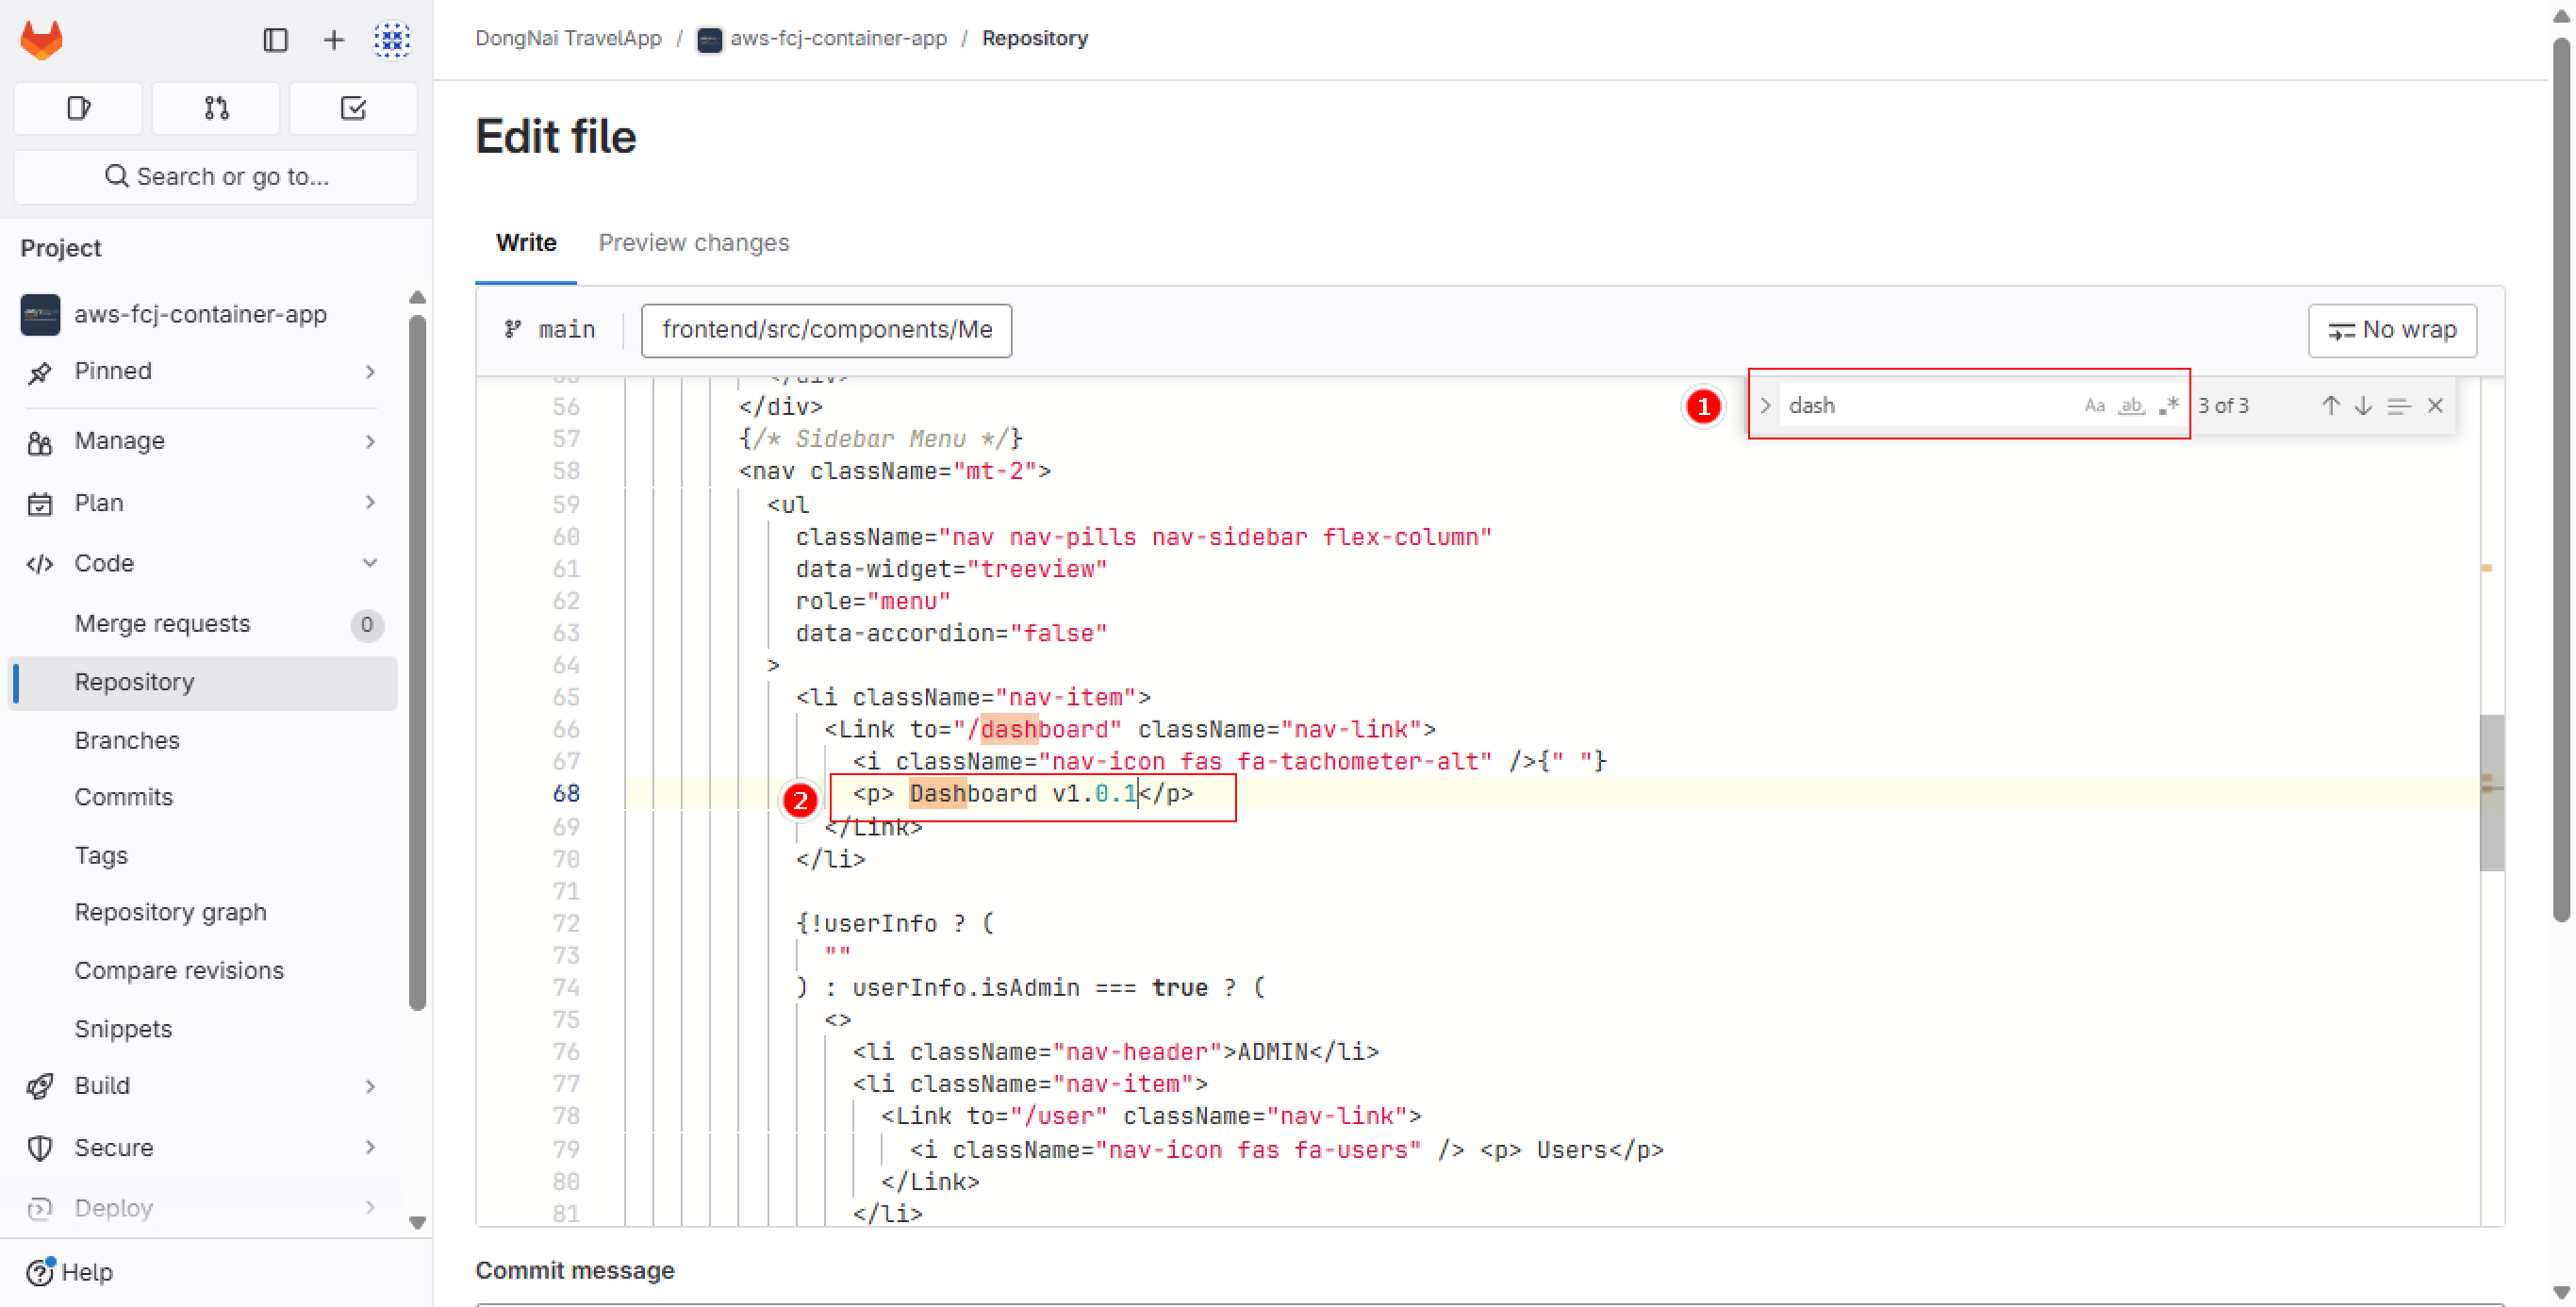
Make changes:
- Locate the section to modify
- Update text from Dashboard to Dashboard v1.0.1
- Commit Changes
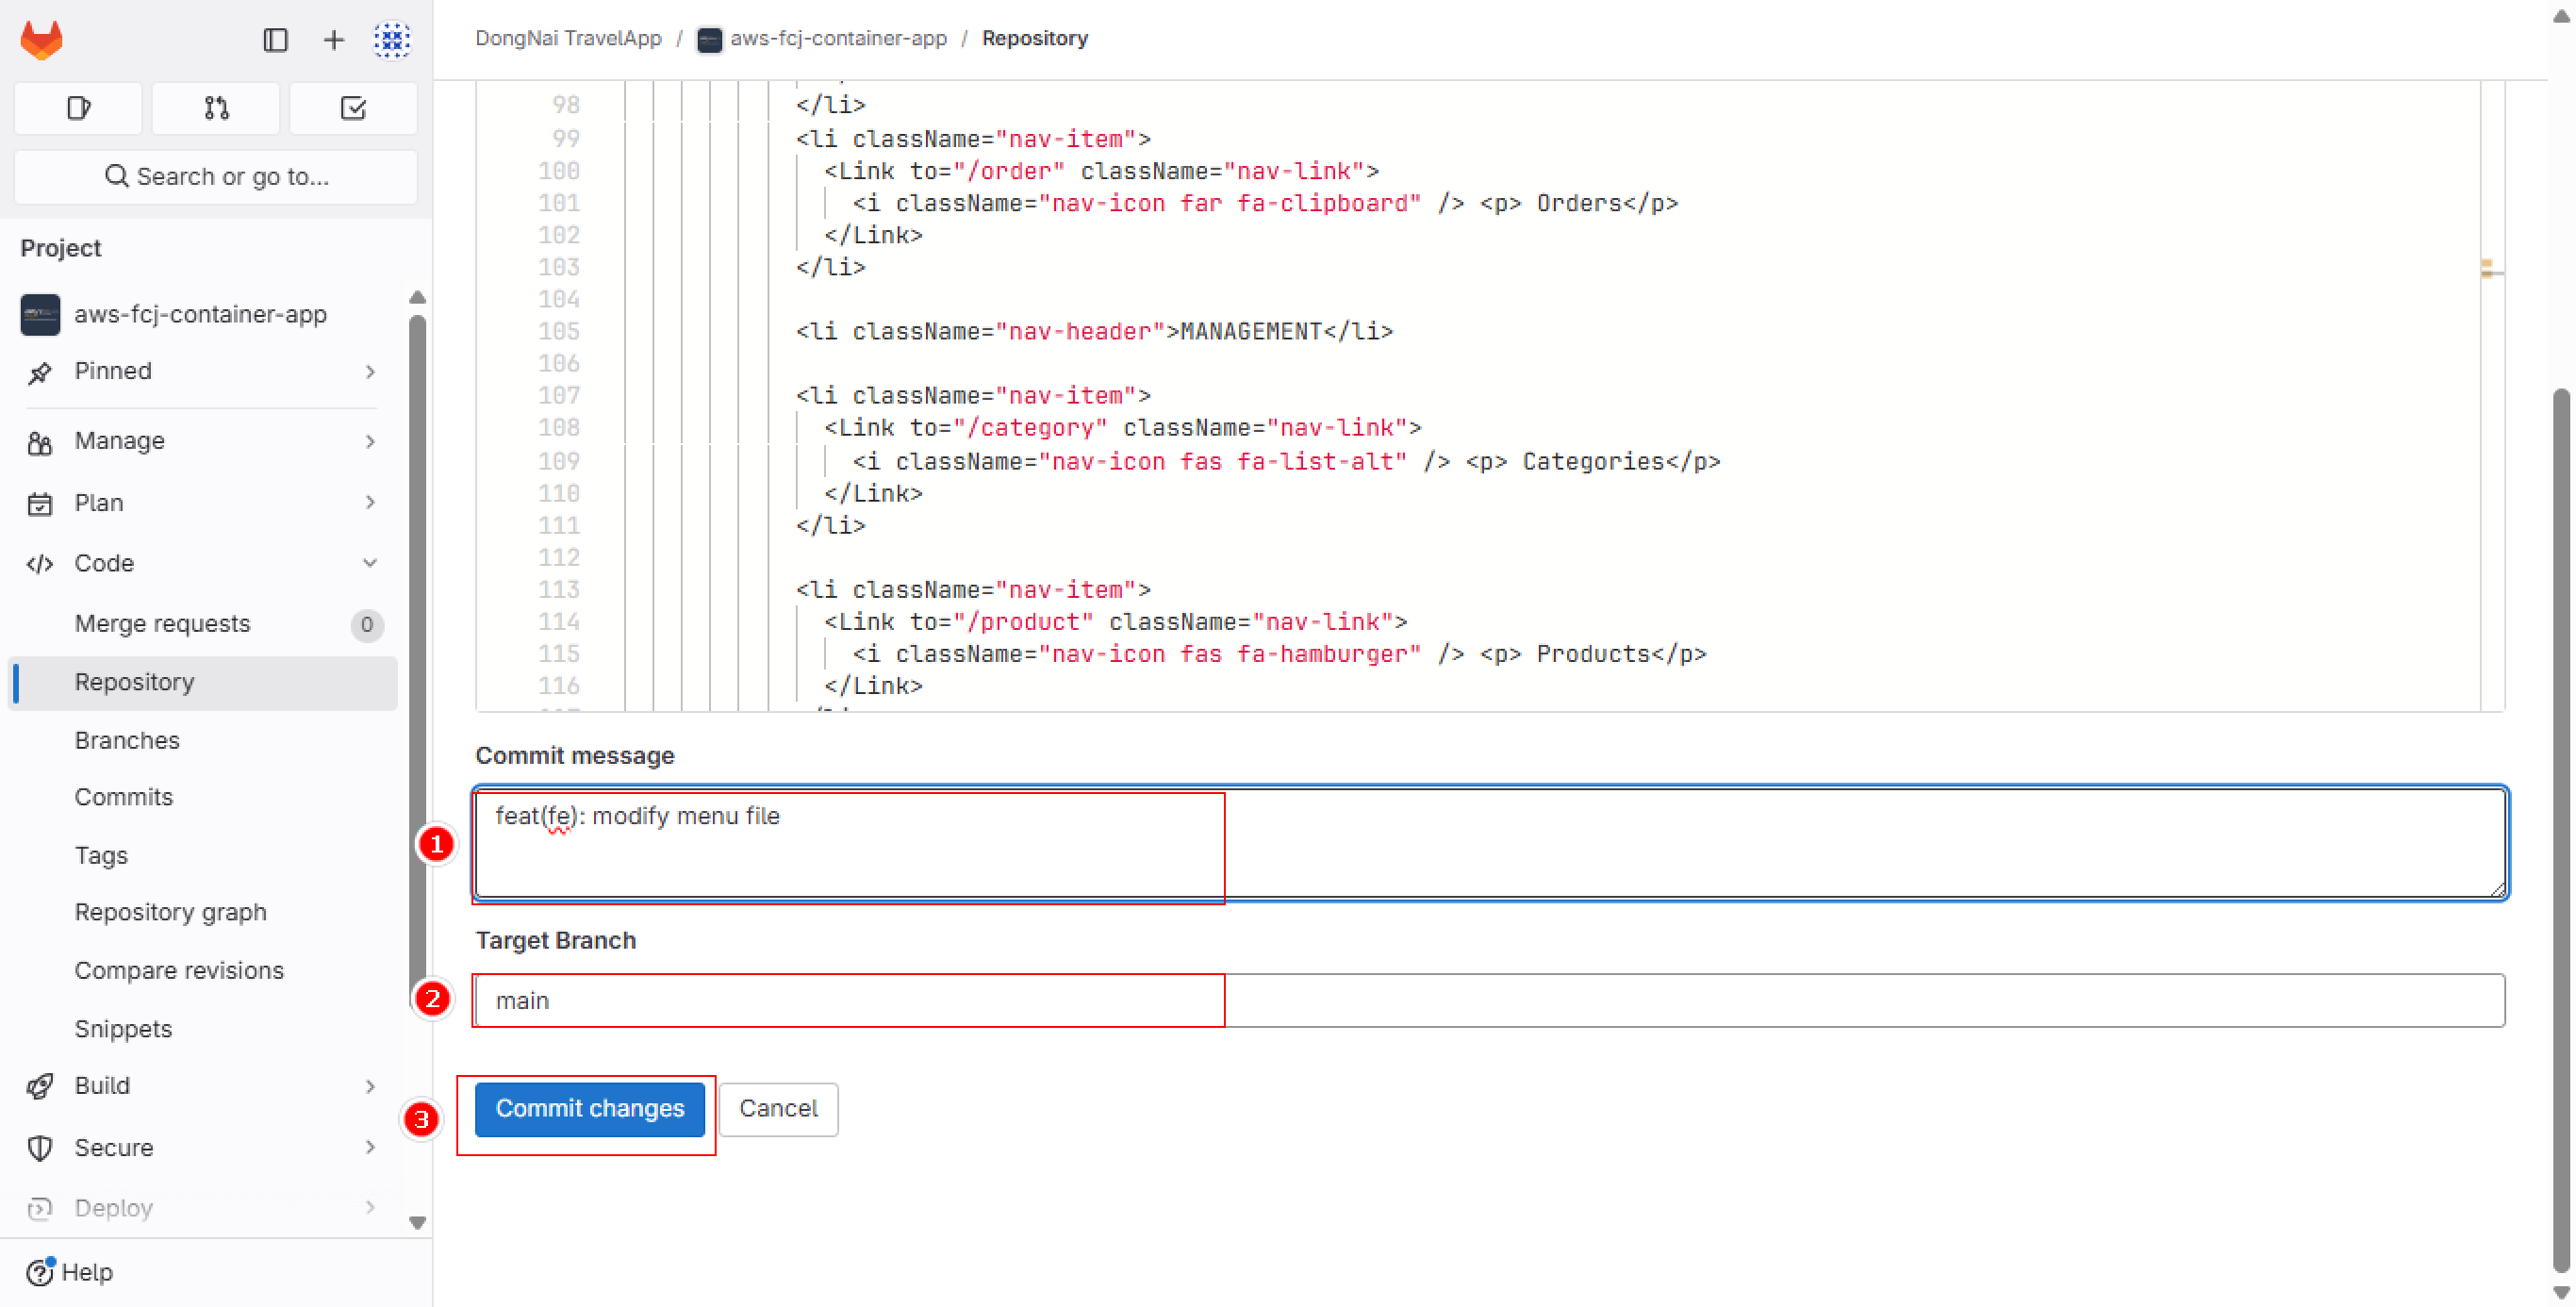
Save the changes:
- Write a descriptive commit message
- Confirm target branch is main
- Confirm with Commit changes
Commit messages should follow the format: type(scope): message Example: feat(frontend): update dashboard title to v1.0.1 This helps in tracking and managing project changes effectively.